The kitchen sink...probably the most-used feature of your home. We use it to wash dishes, get a drink of water, fill the pet’s water bowl, and rinse things. All that use can result in some wear and tear on the caulking around your sink.
Why would the caulk need to be replaced?
Caulk is an integral part of sealing around your kitchen sink. It helps to prevent water damage to the countertop as well as the cabinet and contents beneath the sink. Leaks around a sink can result in mildew, mold, and potential water damage.
As home inspectors, we check the caulking around sinks. It’s important to look up and under sinks for water damage as part of our home inspection process. As a homeowner, that’s an important inspection for you to make on occasion or if you think there may be an issue.
Caulking a sink is relatively simple.
In a few short steps and with a little patience, you can replace the caulk around a sink. We will run through the basic steps below.
Choose the proper caulk (sealant).
You will want to choose a caulk that matches your countertop surface as well as your sink. You will also want to choose the right type of caulk that will work best with the surfaces you are caulking. Silicone is a good choice for most applications, but if you are working with an acrylic surface, you may need a different type of caulk. Ask for help or take some time to read the varying product labels to see what type of caulk will work best for you.
Clean the surface before caulking.
Now it’s time to clean the surface you will be caulking or re-caulking. If there is old caulk to be removed, you will need a utility knife or a flat razor to cut away the old caulking. Be careful not to damage any surfaces. Also, make sure to wear the proper personal protection, such as gloves, safety goggles, etc. If there are any residual or small pieces of caulk left over, you can use rubbing alcohol to try and remove them.
When all the old caulk has been removed, use mineral spirits to clean the surfaces of any residue or oils. Wipe the area to be caulked with a clean, dry cloth, and let the area air dry.
Prepare the surfaces where the caulk will be applied.
Once the surface has been thoroughly cleaned, it’s time to apply the caulk. One easy prep trick is to apply painters tape to the surfaces adjacent to the seam you are caulking. You can then lay your bead of caulk, wipe away any excess, and, when finished, remove the tape to leave a nice, straight, clean line.
Cut the tip of the caulk tube and load the caulk gun.
Determine the approximate size of the caulk bead you will be applying and cut the tip of the caulk tube at a 45-degree angle accordingly. You then have to use a long nail or the pivoting wire attached to the bottom of the caulk gun (if so equipped) to break the seal in the top of the caulk tube. Place the caulk tube in the caulk gun and push the spring-loaded piston up against the end of the caulk tube. Squeeze the trigger until caulk starts to come out of the end of the caulk tube.

Caulking gun
Apply the bead using the proper speed and pressure.
This can take some practice if you are a beginner. Try to keep constant pressure on the trigger as you slowly draw the tip of the caulk gun through the seal you are caulking. Applying just the right amount makes it easier to finish and blend the caulk seam. Too much caulk, and you are left with a lot of cleanup.

Laying a bead of caulk using painters tape as an edge
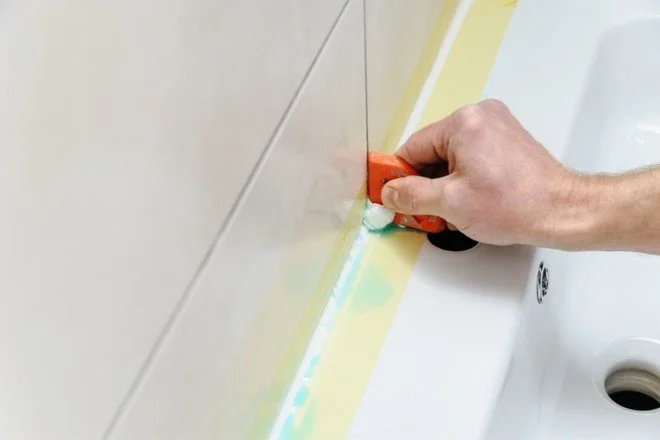
Shaping caulk at the seam using a caulk tool and cleanup
How much is this going to cost?
If you don’t have the necessary tools, buying what you need is going to be the biggest cost. The caulk itself isn’t that expensive. If you hire someone, the labor cost will be your biggest expense. Most projects completed by a handyman will cost you anywhere from $150 to $400. Make sure to get a couple of bids, as prices may vary depending on who you call.
Summary
Caulking your kitchen sink can appear to be a pretty simple project. It is, but you have to have the proper caulk, the right tools, a little skill, and some patience. If you think you may have some future caulking projects, you can invest in the tools and maybe become the neighborhood expert. Also, if you have the tools and a full tube of caulk, after careful inspection of other areas of your home, you may just find some other projects.
At HomePro Inspections, our home inspectors are trained to inspect the caulking around sinks, tubs, and showers and identify any defects. Any issues are documented in your home inspection report and recommended for resolution by a qualified professional.
Visit our website to learn more or to schedule your home inspection in the Rochester, Owatonna, and Faribault, MN areas. You can contact us today at (507) 202-8942 or utilize our online “Schedule Now” feature to set up an appointment.