Mold and Dampness Basics

Is it common to have mold in buildings?

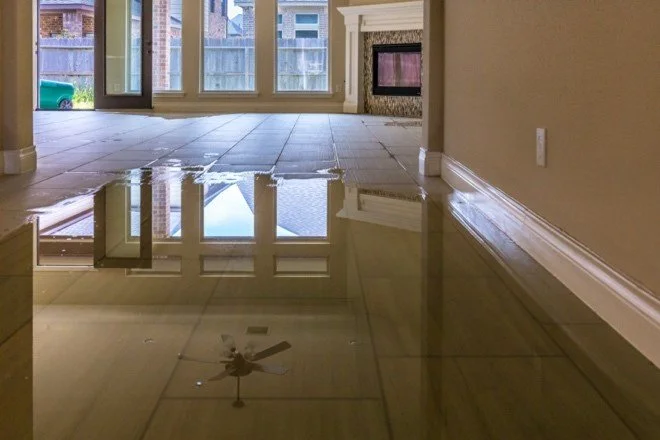
The answer is yes; mold is very common in homes and buildings. If you have areas of your home that are high in moisture, you have the potential for mold. Leaks around windows, doors, plumbing, or roofs, and wet basements or flooding are areas with potential for mold. If consistently wet, mold will grow on wood, sheetrock, insulation, ceiling tiles, carpeting, and many other materials in your home. Given the right conditions, mold can grow on most any surface.

 What kinds of mold can grow in my home?

Cladosporium, Penicillium, and Aspergillus are some of the more common kinds of molds found in homes and buildings. There are others, but these are the ones that seem to be everywhere. And they are happy to quickly grow when and where the conditions are right.

 Penicillium mold spores

How does mold get into and grow in my home?

Molds are everywhere in our environment, indoors and outdoors, and play an important role in nature. For example, in nature, molds breakdown and decompose leaves and other organic materials to help nourish our soils.

 Open windows and doors are the most typical entry points for mold into a home. Mold spores can also be tracked into your home on your shoes and clothing. Pets can also bring mold into your home. When mold spores find themselves in areas of high moisture and the right temperature, they will grow. There are a multitude of areas in your home where building materials and the right amount of moisture provide suitable nutrients to encourage mold growth. Molds are very adaptable and can grow at varying levels of moisture, temperatures, and materials.

 What types of materials do molds grow on?

Materials that contain cellulose, like wood, ceiling tiles, paper products, and cardboard, provide the nutrients mold loves to grow on. When conditions are right, mold can also grow on a variety of other surfaces and substances, including paints, wallpaper, insulation, gypsum (drywall), carpets, and upholstery. Mold can even grow on dust!

 How does a person know if their house has a mold problem?

The best way to determine if you have a mold problem is through mold testing. Our home inspectors are trained to perform mold testing using a method of gathering and analyzing air samples. Unless visible, the source of a mold problem can sometimes be hard to find. If you have a larger mold issue, infestations can usually be smelled or easily seen, such as in basements or other confined or poorly ventilated areas.

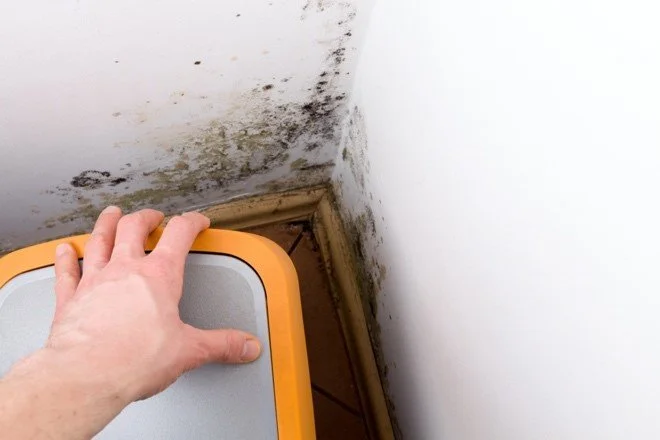
 Moisture staining at the baseboard

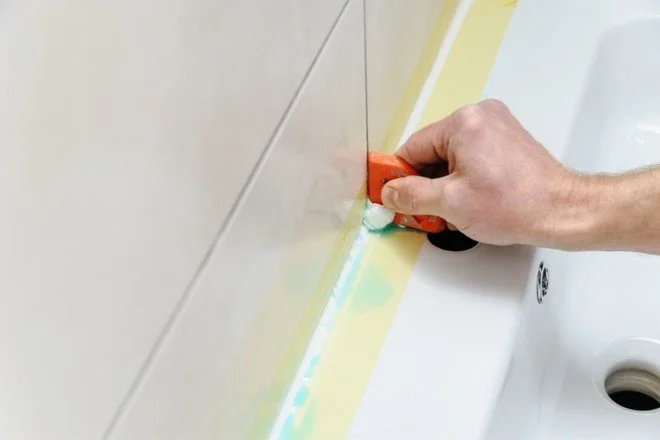
 How can I keep mold out of my home?

As a part of your routine home maintenance, look for evidence of moisture or signs of mold. Conduct a thorough assessment of your home, paying close attention to any signs of flooding, infiltration, condensation, or leaks. If you find conditions that are conducive to causing mold, correct them right away.

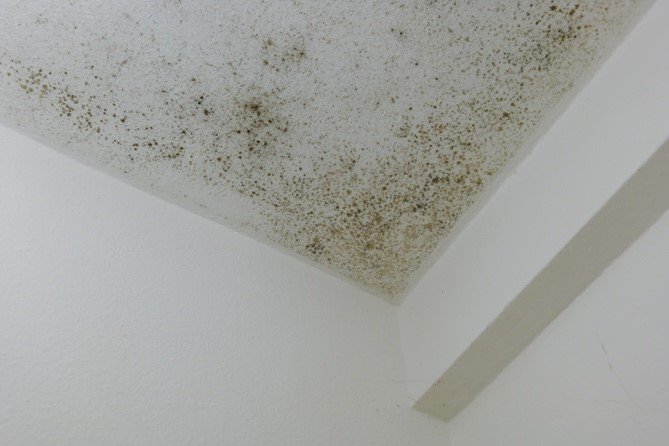
 Potential mold at a window

 You can help control mold in your home by following the guidelines below:

·         Maintain humidity levels between 30% and 50%.

·         Fix any leaking pipes, roofs, or windows promptly.

·         Thoroughly dry and clean any areas where flooding has occurred.

·         Use exhaust ventilation in bathrooms, kitchens, and laundry areas.

·         Use your air conditioning during hot, humid weather.

 Summary

Mold is everywhere. The key is to perform periodic inspections of your home and to resolve any issues you may come across. Pay attention to musty odors, especially in damp basements and confined spaces. Controlling humidity and keeping these areas of your home dry will go a long way toward keeping mold to a minimum in your home.

 At HomePro Inspections, although mold testing is not part of a home inspection, our home inspectors are trained to look for and report any potential issues they may come across. Any issues are documented in your home inspection report and recommended for resolution by a qualified professional.

 Visit our website to learn more or to schedule your home inspection in the Rochester, Owatonna, and Faribault, MN areas. You can contact us today at (507) 202-8942 or utilize our online “Schedule Now” feature to set up an appointment.


Make a New Year’s Resolution to Take Care of Your Home

It’s the start of a new year, that time when we make resolutions. This year, why not make a resolution to take better care of your home? You don’t have to do all the projects at once; just make a plan and stick to it. Don’t forget, there are resources on the internet that address most anything. Do your research and keep your skill sets in mind as you tackle any project.

Make an assessment or inspection of your home.

If you’ve had a home inspection and were there when it was conducted, you may remember that your home inspector looked at a lot of aspects of your home. If you still have it, refer to your home inspection to get a general idea of what areas to cover. Go through the inspection report sections and make a plan for assessing each area of your home.

 Prioritize your findings based on severity (must do, should do, would be nice to do) or by category, like mechanical or cosmetic. Do whatever works for you. Think about costs and how you may want to or have to budget the projects.

 Set aside an emergency fund for home repairs.

Putting aside money every month can help to take the bite out of any unforeseen costs associated with the maintenance of your home. We usually recommend this during the course of a home inspection.

 Most experts recommend allocating 1% to 3% of your home’s value for maintenance or repairs. First-time homeowners can be overwhelmed by the “startup costs” of owning a new home. Having a maintenance fund can help take some of the stress out of having to pay for unexpected repairs.

 Perform annual heating and cooling maintenance.

It can be easy to ignore your HVAC (heating, ventilation, and air conditioning) systems. After all, they’re just supposed to work, right?

 We recommend annual maintenance of these systems. Maintaining your HVAC system will help it run smoothly and avoid major surprises and expenses. One of the most common HVAC notations our home inspectors make when inspecting HVAC systems is “System does not appear to have been maintained per manufacturer’s recommendation within the last year.” If you have a whole-house air-to-air exchanger, make sure to follow the manufacturer’s instructions for maintenance.

 Some utility companies offer programs that are add-ons to your utility bill and will cover your annual HVAC maintenance. These programs are well worth the money. An example our home inspectors share is that if your 90% efficient furnace is running at 80% efficiency, that’s another 10 cents of every dollar you spend on energy that is going right up the exhaust stack.

 Change your HVAC filters when specified.

Based on the type of filter your system requires, it should be changed based on the manufacturer’s recommendation. Dirty filters will not only compromise your home’s air quality, but they will also rack up increases in your energy costs. Dirty filters restrict air flow and make it harder for your HVAC system to efficiently move air. If the fan has to run longer and harder, that will result in higher energy costs. Whether you change your filter monthly, quarterly, or annually, having them on hand makes the task easy and can help you stay on schedule.

 Keep your dryer vent clean.

Clogged dryer vents make your dryer work harder and reduce efficiency. The frequency of cleaning your dryer vent will vary based on your family size, but it should be cleaned annually. If you notice that the dryer cycle is starting to increase, take the time to clean the dryer vent. Another reason to keep your dryer vent cleaned is to help prevent fire hazards. If you are not up to the task or if your dryer venting is hard to access, have the cleaning done professionally.

 Test and maintain smoke and carbon monoxide detectors.

For your family’s safety, make sure you are checking that your smoke and carbon monoxide detectors are tested with the test buttons per the manufacturer’s recommendation. In addition, make sure they are clean and the batteries are replaced regularly. Smoke and carbon monoxide detectors should also be replaced every 7 to 10 years. Our home inspectors commonly find units that are years past the replacement date.

 Check and clean your rain gutters and downspouts.

Keeping water away from the foundation of your home will help to avoid and reduce damage. If your roof is high and steep, we recommend you hire a professional. Keep in mind that an inch of rain on a surface area of 1000 square feet equates to roughly 630 gallons of water. Clean gutters and properly directed discharges will keep that water away from your home’s foundation.

 Inspect and maintain your door and window seals.

Door and window seals should be inspected and replaced as needed if they are damaged, loose, or worn. Reducing or eliminating leaks will save you money and keep your home more comfortable. Aside from obvious damage, using a smoke stick or lighter flame can help determine if you have a draft or leak that needs to be repaired.

 Clean your kitchen appliances.

Debris, dust, cooking splatters, and dirt can accumulate on, around, and under your kitchen appliances. Take some time to carefully pull out your appliances to clean around and under them. Keeping the cooling coils and compressor area of your refrigerators and freezers dusted and clean will help the appliance run more efficiently. Run your oven through the cleaning cycle, and make sure that any exhaust vent filters are regularly cleaned.

 Inspect your roof.

Inspect your roof regularly, especially after a storm and in the spring after the snow melts. If you are uncomfortable with walking on your roof or you feel it’s too dangerous, you can at the very least view it from the ground or eaves with binoculars. Look for damaged and/or deteriorated shingles, and make sure there are no tree branches or debris lying on or in contact with the roof. Repair, replace, or remove as necessary.

 Inspect and clean your fireplace chimney.

If you have a wood-burning fireplace, it is recommended that the firebox and chimney be inspected and cleaned annually. Depending on the use and system in your home, having it professionally cleaned will help the fireplace operate efficiently and safely. Gas fireplaces should be maintained annually to ensure efficient operation.

 Take care of your trees and shrubs.

Annual trimming and inspection of your trees and shrubs helps to prevent damage to your home. Trees are bare in the late fall and winter, which makes it easier to see any damaged, broken, or sagging branches. Keeping tree and shrub branches away from your siding and shingles keeps them from rubbing against them in the wind and causing damage. It also makes it harder for squirrels, chipmunks, and other animals to get on your roof.

Summary

Keeping your home maintained and running at peak efficiency will save you money and protect your largest asset. You may also gain some new skills and satisfaction from taking on some projects you have never tackled before. The items above are not all-encompassing. If you see something in your home that doesn’t seem right, address it sooner rather than later. Maintenance issues do not fix themselves and do not get better over time.

 At HomePro Inspections, our home inspectors are trained to inspect the areas addressed in this article. Any issues are documented in your home inspection report and recommended for resolution by a qualified professional.

 Visit our website to learn more or to schedule your home inspection in the Rochester, Owatonna, and Faribault, MN areas. You can contact us today at (507) 202-8942 or utilize our online “Schedule Now” feature to set up an appointment.

Preparing Your Home for a Home Inspection

Having a home inspection performed on your home, whether it is a pre-listing inspection or a buyer’s inspection, can be a stressful time for a homeowner. We get it… “Someone is going to be going through my house and picking it apart.” That’s not it. Our job is to simply provide an objective assessment of the condition of the home on the day of the inspection.

 Home Inspection

However, there are other ways to look at it.

As a homeowner, if you are doing a pre-listing inspection, we are trying to put you in control by providing you a list of items you may want to take care of before listing the home. We’re not there to call your baby ugly; we’re there to help you get your home in tip-top shape. This allows you to take care of things when and how you want.

 Of course, some things may seem picky, but you probably want to make sure that everything is corrected. The point is, you may be able to fix that leaky toilet valve or replace a defective GFCI on your own terms. A potential buyer may request that a plumber or an electrician perform these maintenance issues, which will cost you much more. Of course, if any of these tasks are outside your skill set or comfort zone, it’s always best to hire a professional.

 Preparation for a Home Inspection

Preparing for a home inspection from a home inspector’s point of view means making sure that everything is accessible. If we can’t get at it or operate it, we can’t fully inspect it. The following is a list of things you can do as the home seller that can help make the inspection process go more smoothly and be completed without having to make a second trip. Second trips cause delays, add costs, and create inconvenience for everyone involved.

 First and foremost, make sure all the utilities are turned on.

Electricity, gas, and water should be turned on and operating for the home inspection. Without utilities, there are a lot of aspects to the home inspection that we just can’t address. This seems like it should be common sense, but we run into it often enough that it’s worth mentioning.

 Our Standards of Practice state that we are not required to, nor should we, turn on any utility or light pilot. The last thing we want is for something to flood or explode; it may be shut off for a reason. If we are granted permission by a homeowner to turn on a valve and/or light a pilot, we will do so.

 If the utilities are not on, we have to disclose what we were not able to fully inspect and recommend that the appliance or system be inspected by a qualified professional after the utility has been restored.

 Gas pilots need to be lit. Most newer gas appliances have electronic ignitions, while older ones have standing pilots that have to be manually lit. This can also be the case for some newer appliances. In order for us to test the functionality of a gas appliance, we need to see it in operation.

 The most common appliances that are not lit are gas fireplaces, water heaters, and garage furnaces. Homeowners tend to shut off gas fireplaces and garage furnaces in the spring. Water heaters are commonly shut off in vacant homes.

 The electrical panel is hidden behind the ladder

Access

There are a lot of places a home inspector needs to access to do their job—places most people don’t even think about. The following is a list of common areas where we may have difficulty finding easy access or may encounter stored items. I’ve also included some interesting encounters I’ve had while performing home inspections.

 Attic(s): Attics are the most common area that we have trouble accessing. If the access is sealed, it has to be cut open. Although the Purchase Agreement has a statement allowing us to cut the access panel open, people forget and get upset when we cut holes in their home. Making sure that we have permission and access is a big help for us. If given permission, we will cut the access panels open.

 Garage: Detached garages need to be accessed during an inspection. Please remember that we will need a key or garage door opener.

 Electrical Panel(s): Home inspectors have to be able to safely remove the front cover of the access panel. Please make sure that there are no personal items stacked in front of the panel. This may include cabinets, shelves, and hanging pictures.

 Crawl Space: If your home has an access panel to the crawl space, please make sure we have clear access to it and that it is not locked. Sometimes we come across access panels that are sealed and nailed shut. If this is the case, we will not be able to inspect the crawl space.

 Furnace and Water Heater: Please make sure there is clear access for the home inspector. We need to be able to remove access panels to inspect these appliances.

 Blinds and Window Coverings: To help the home inspector, please open all blinds, drapes, and curtains. Although it’s an exceptionally rare event, it is possible for window coverings to become damaged during a home inspection. They can also take a lot of time to open and close during the course of the home inspection.

 Appliances Are Plugged In: If an appliance is functional, it should be plugged in. If a stove, refrigerator, or dish washer is unplugged, we will assume it is unplugged for a reason.

 Pets: Please secure your pets. More than once, I’ve had a cat scoot out the door as I was entering a home, garage, or crawl space. One time I had a pit bull freak out when I turned on my flashlight to look under a kitchen cabinet. Luckily, the homeowner was there to grab the dog before it came after me. Apparently, he was a rescue pet with some past flashlight issues. Another time, when I was inspecting a home on a farm, the homeowners had “free-range” chickens. The chickens followed me around and were underfoot the entire time I was inspecting the exterior of the home. I guess they thought I had food for them!

 Summary

A home inspection can be stressful for both the buyer and seller of a home. Taking some time to prepare the home for a home inspection can help the home inspector do their job more thoroughly and efficiently.

 At HomePro Inspections, our home inspectors are trained to inspect all areas of the home. Having proper access will help your home inspector perform their job efficiently and thoroughly. Any issues found are documented in your home inspection report and recommended for resolution by a qualified professional.

 Visit our website to learn more or to schedule your home inspection in the Rochester, Owatonna, and Faribault, MN areas. You can contact us today at (507) 202-8942 or utilize our online “Schedule Now” feature to set up an appointment.

Replacing Exterior Door Weatherstripping

It’s winter, and now you can really notice the leaky draft at the front door. Replacing worn or damaged weatherstripping will not only keep your home more comfortable, but it will also help to reduce your energy consumption, and your furnace will not have to work as hard. And, of course, doing this before the cold weather hits will make the job easier.

Exterior door weatherstripping

According to ENERGY STAR®, weatherstripping can save you up to 20% on your heating and cooling costs. Typically, someone with basic skills can tackle most weatherstripping projects. It’s relatively simple, but you need to make sure that you are using the best products for the job at hand and installing them correctly.

 Exterior door weatherstripping and threshold

Assemble your tools and materials

·         Tape measure

·         Screw drivers

·         Scissors

·         Cleaning supplies

·         Replacement weatherstripping

·         Replacement door sweep

 Steps to replace your weatherstripping

·         Prepare the area

Remove as much of the dirt and debris as possible. Clean the area with hot, soapy water. Use sandpaper or stronger solvents to remove any residue that the hot, soapy water doesn’t remove.

 ·         Tighten your door hinges.

People never think of their door hinges. Lift on the door handle to make sure there is no play or looseness. Tightening the hinges ensures that the door will sit squarely in its frame and that it will close properly.

 Door hinge

 ·         Take measurements and determine the type of weatherstripping you need

Measure the width as well as how tall your door opening is to determine how much weatherstripping you will need. Many of the more modern doors use similar products. Define the products needed and how much you will need. Many of the big-box stores will have several choices and kits for replacing the more popular and commonly used products. There are pros and cons to varying choices of weatherstripping. Now is not the time to be cheap. Spend the money and buy the best product for your job.

 ·         Remove the old weatherstripping and door sweep

The weatherstripping and door sweep on most modern doors are typically installed by being pressed or inserted into a slot in the door frame or door itself. Most times, you can simply pull the old weatherstripping out with little effort, unless it has been adhered in place with paint.

 Door sweeps can sometimes be removed with the door in place. If this is too difficult, it may be faster just to remove the door from the hinges. You will probably need some additional help with this.

 Door sweep at the bottom of the door

·         Remeasure and cut the weatherstripping to length

The pre-cut replacement weatherstripping is typically a bit longer than the actual door opening. Remeasure and cut the weatherstripping to length. Check the length and adjust if necessary for the best fit. Slide the new weatherstripping into the appropriate slot in the frame. Double-check the length of the door sweep and cut as necessary.

 ·         Confirm fit and function

Open and close your door to make sure that the fit and function of your new weatherstripping are correct. Keep in mind that the new weatherstripping may cause your door to open and close a bit harder. Over time, this will ease up as the weatherstripping sets in place.

 Summary

Replacing your exterior door weatherstripping will take an hour or so and is relatively inexpensive. The process is simple and is one of the more cost-effective ways to save money on your home heating costs. It also helps to keep rain, insects, and rodents out of your home.

 At HomePro Inspections, our home inspectors are trained to inspect the weatherstripping and function of the door seals and identify any defects. Any issues are documented in your home inspection report and recommended for resolution by a qualified professional.

 Visit our website to learn more or to schedule your home inspection in the Rochester, Owatonna, and Faribault, MN areas. You can contact us today at (507) 202-8942 or utilize our online “Schedule Now” feature to set up an appointment.


Caulking Around a Kitchen Sink

The kitchen sink...probably the most-used feature of your home. We use it to wash dishes, get a drink of water, fill the pet’s water bowl, and rinse things. All that use can result in some wear and tear on the caulking around your sink.

 Why would the caulk need to be replaced?

Caulk is an integral part of sealing around your kitchen sink. It helps to prevent water damage to the countertop as well as the cabinet and contents beneath the sink. Leaks around a sink can result in mildew, mold, and potential water damage.

 As home inspectors, we check the caulking around sinks. It’s important to look up and under sinks for water damage as part of our home inspection process. As a homeowner, that’s an important inspection for you to make on occasion or if you think there may be an issue.

 Caulking a sink is relatively simple.

In a few short steps and with a little patience, you can replace the caulk around a sink. We will run through the basic steps below.

 Choose the proper caulk (sealant).

You will want to choose a caulk that matches your countertop surface as well as your sink. You will also want to choose the right type of caulk that will work best with the surfaces you are caulking. Silicone is a good choice for most applications, but if you are working with an acrylic surface, you may need a different type of caulk. Ask for help or take some time to read the varying product labels to see what type of caulk will work best for you.

 Clean the surface before caulking.

Now it’s time to clean the surface you will be caulking or re-caulking. If there is old caulk to be removed, you will need a utility knife or a flat razor to cut away the old caulking. Be careful not to damage any surfaces. Also, make sure to wear the proper personal protection, such as gloves, safety goggles, etc. If there are any residual or small pieces of caulk left over, you can use rubbing alcohol to try and remove them.

 When all the old caulk has been removed, use mineral spirits to clean the surfaces of any residue or oils. Wipe the area to be caulked with a clean, dry cloth, and let the area air dry.

 Prepare the surfaces where the caulk will be applied.

Once the surface has been thoroughly cleaned, it’s time to apply the caulk. One easy prep trick is to apply painters tape to the surfaces adjacent to the seam you are caulking. You can then lay your bead of caulk, wipe away any excess, and, when finished, remove the tape to leave a nice, straight, clean line.

 Cut the tip of the caulk tube and load the caulk gun.

Determine the approximate size of the caulk bead you will be applying and cut the tip of the caulk tube at a 45-degree angle accordingly. You then have to use a long nail or the pivoting wire attached to the bottom of the caulk gun (if so equipped) to break the seal in the top of the caulk tube. Place the caulk tube in the caulk gun and push the spring-loaded piston up against the end of the caulk tube. Squeeze the trigger until caulk starts to come out of the end of the caulk tube.

 Caulking gun

 Apply the bead using the proper speed and pressure.

This can take some practice if you are a beginner. Try to keep constant pressure on the trigger as you slowly draw the tip of the caulk gun through the seal you are caulking. Applying just the right amount makes it easier to finish and blend the caulk seam. Too much caulk, and you are left with a lot of cleanup.

 Laying a bead of caulk using painters tape as an edge

 Shaping caulk at the seam using a caulk tool and cleanup

 How much is this going to cost?

If you don’t have the necessary tools, buying what you need is going to be the biggest cost. The caulk itself isn’t that expensive. If you hire someone, the labor cost will be your biggest expense. Most projects completed by a handyman will cost you anywhere from $150 to $400. Make sure to get a couple of bids, as prices may vary depending on who you call.

 Summary

Caulking your kitchen sink can appear to be a pretty simple project. It is, but you have to have the proper caulk, the right tools, a little skill, and some patience. If you think you may have some future caulking projects, you can invest in the tools and maybe become the neighborhood expert. Also, if you have the tools and a full tube of caulk, after careful inspection of other areas of your home, you may just find some other projects.

 At HomePro Inspections, our home inspectors are trained to inspect the caulking around sinks, tubs, and showers and identify any defects. Any issues are documented in your home inspection report and recommended for resolution by a qualified professional.

 Visit our website to learn more or to schedule your home inspection in the Rochester, Owatonna, and Faribault, MN areas. You can contact us today at (507) 202-8942 or utilize our online “Schedule Now” feature to set up an appointment.


Ice Dams, What They Are, and How to Prevent Them

Winter is here, and so is the potential for ice dams. It’s one thing to have icicle formation after some warm weather, but quite another if these icicles are a result of ice dams. To reduce the potential for damage to your home, it’s important to understand how ice dams form, how they can impact your home, and methods to prevent them from forming.

 Ice dam at the roof edge

 What is an ice dam?

Icicles can form at the bottom edge of a roof line or on gutters when water gets cold enough to freeze. If water is running down your roof and it is at or near freezing, the water that drips off the edge starts to form icicles.

 As gutters fill and freeze, they become heavy and can cause damage to your gutter system. If the water continues to build up, it creates an ice dam at the eaves, which will not allow water to flow over the edge of the roof. This water can find its way under the roof coverings and into your eaves, or worse, your walls and ceilings.

 Icicles and ice dams are a sign of a larger problem with the house. When the roof covering is warmer than the eaves, even in below-freezing temperatures, ice dams can form.  

What are the main causes of ice dams?

The two main causes of ice dams are poor insulation and inadequate ventilation in the attic space. If your home has minimal or poor insulation, heat from within your home will rise into the attic space and warm the roofing materials. Snow on those surfaces will melt and flow to the edges of your roof. The overhangs on your roof will be colder than the attic space. Once that water hits the edge, it will start to freeze and build up.

 How an ice dam forms

Inadequate ventilation will result in condensation building up on the bottom of the roof decking. Moisture from inside your home will find its way into the attic space. Condensation on the roof decking and structural materials may cause staining and/or moisture damage.

 Our home inspectors will look for signs of moisture staining and evidence of ice dams when performing your home inspection. In the winter, when we're inspecting an attic space, we often see frost on nails and other metal fasteners where there may not be adequate ventilation.

 On one home inspection years ago, I saw icicles in the attic space of an older home that had very little attic space ventilation. Photos were taken, and the condition was noted in the home inspection report.

 How can I prevent ice dams?

Most times, this issue can be resolved fairly easily. The best course of action to prevent ice dams would be to increase the insulation and improve the ventilation in the attic space. If the roof is not warm, the snow that falls on it will not melt easily. The best-case scenario is for the roof to be at a temperature matching the outside air. This keeps snow from melting and refreezing at the eaves.

 Some older homes do not allow for additional insulation in the area where the exterior wall meets the slope of the roof. If this is your case, you might try one or more of the options below.

 Sometimes, heating tapes or cables can be installed to melt ice dams at the eaves and create pathways for the water to flow from the roof. Adding heating tapes or coils addresses the symptom but not the conditions that create the ice dams. Again, your first course of action should be to review the insulation levels and ventilation of your attic space.

 Another measure of prevention is to use a roof rake to pull fresh snowfall from the eaves of your home. Pulling the snow from the eaves will allow the sun to keep this part of your roof warm, thus helping to reduce ice dams. You will want to be extra careful not to damage the roof surface when using a roof rake. Again, however, this does not resolve the root cause of ice dam formation.

 Using a roof rake to prevent ice dams

 At HomePro Inspections, our home inspectors are trained to inspect your attic space and identify any defects that may lead to damage. Any issues are documented in your home inspection report and recommended for resolution by a qualified professional.

 Visit our website to learn more or to schedule your home inspection in the Rochester, Owatonna, and Faribault, MN areas. You can contact us today at (507) 202-8942 or utilize our online “Schedule Now” feature to set up an appointment.


Replacing Your Washing Machine Hoses

One of the questions our home inspectors get quite frequently during a home inspection is “How do you replace washing machine hoses?” Fortunately, it’s a simple and relatively inexpensive process.

 Hot and Cold Washing Machine Hoses

 Washing machine hoses are one of those things in a home that are, for the most part, out of sight and out of mind. They are neglected, and unfortunately, a leak or some flooding may happen before they get the attention they deserve.

 Our home inspectors come across washing machine hoses during inspections that may be leaking and have corroded connections. Sometimes our home inspectors find hoses with a large bulge in them that looks like it is about to burst.

 Before You Get Started

Visit your favorite hardware or big box store and purchase a good set of washing machine hoses. This is not something you want to skimp on. I recommend a quality set of stainless-steel braided hoses. These are going to cost in the range of $30 to $35.

 Tools and Supplies

·         A large pair of channel lock pliers

·         Bath towels

·         5-gallon bucket

 Steps to Follow for Replacing Your Washing Machine Hoses

 Turn off the water supply to the washing machine.

If you are lucky, this will be simple. There should be a service box in the wall or plumbing within a few feet of the washing machine that your washing machine hoses are connected to. Older homes with the laundry room in the basement may have old, corroded valves that may take a little work to close. If so, take your time and don’t force things. You don’t want to break a valve. If it looks like it may be beyond your skill set, it might be time to call a plumber.

 Unplug the washing machine.

You may have to slide the washing machine away from the wall to get to the electrical plug and outlet. Unplug the washing machine to prevent an accidental shock. Sliding the washing machine away from the wall will also give you clear access to the washing machine’s hoses and valves.

 Place one of your old bath towels on the floor below the washing machine hose hookups and have your bucket in place. There will be water in the hoses and most likely a little pressure, so you want to be ready to contain any leaks or dripping.

 Disconnect the old washing machine hoses.

Washing machine hose connections are similar to a garden hose. Use your channel lock pliers to disconnect the end attached to the washing machine first. Remember: “Righty-tighty, lefty-loosey.” Place the disconnected end of the washing machine hose in the bucket, allowing the water to drain. Now disconnect the other end from the supply. Repeat for the other hose.

 Be careful not to squeeze the pliers too hard, as the connections at the washing machine may be plastic. Also, pay attention to which washing machine hose is hot and which is cold.

 Disconnecting, Connecting with a Channel Lock Pliers

 Connect the new washing machine hoses.

Washing machine hoses, as we said earlier, are similar to a garden hose. Both ends have the same connector, so everything should hook back up pretty easily.

 Attach the hot supply valve to the hot connector on the back of the washing machine, and the cold to the cold. Finger-tighten the washing machine hose connections first, then use your channel lock pliers to tighten them securely.

 Note: Sometimes it can be easier to do one hose at a time, so you don’t accidentally get the hot and cold mixed up.

 Turn the water supply back on.

Turn the water supply back on slowly, one valve at a time. Take a minute to observe and confirm that there are no leaks and that the connections are tight. Open the valve completely once you are sure there is no leak.

 Once you are sure the first hose is okay, repeat the process for the other hose. Keep an eye on the newly installed washing machine hoses for a while before sliding the washing machine back up to the wall and reconnecting power. Keep your bucket, pliers, and towels handy in case there are any drips or leaks that need to be addressed.

 Summary

You may not be able to call yourself a plumber just yet, but changing your washing machine hoses is a relatively simple project. It takes a little bit of time, but this easy DIY project can save you some money. If you are uncomfortable with any part of the process, it’s okay to call a plumber.

 At HomePro Inspections, our home inspectors are trained to inspect plumbing systems and identify any defects. Any issues are documented in your home inspection report and recommended for resolution by a qualified professional.

 Visit our website to learn more or to schedule your home inspection in the Rochester, Owatonna, and Faribault, MN areas. You can contact us today at (507) 202-8942 or utilize our online “Schedule Now” feature to set up an appointment.

Winter is Coming: How Do I Light My Gas Fireplace?

Winter is coming, and we are getting a lot of questions from our home inspection clients on how to light their gas fireplace. The good thing is that most modern gas fireplaces are simple and easy to light with a few simple steps.

  Gas Fireplace

Per our standards of practice, if the pilot light in your gas fireplace is turned off, our home inspectors are not allowed to light the pilot. We will, however, show you the basics and point you to the manufacturer’s instructions.

 Gas Fireplace Basics

The modern gas fireplace works very similarly to most other natural gas or propane appliances in your home, such as furnaces, water heaters, and gas stoves.

 The gas is supplied to the gas fireplace through a gas line to the control valve. When the control valve is turned on, the gas will flow to the main burner and be ignited by an electrical igniter or a pilot light. The igniter works by electrically producing a spark to light the gas. You will find ignitors in newer gas fireplaces. A pilot light is a continuously lit flame next to the burner. A pilot light is the more traditional source of ignition in a gas fireplace.

 Manufacturer’s Instructions

Most gas fireplaces have a handy set of instructions printed on a metal plate that is chained to the unit in the access panel. It’s pretty typical to find this covered in dust. Use a damp towel to clean the instructions so that you can read them. Note that all gas fireplaces will have instructions unique to your particular model.

  Example of Manufacturer’s Instructions

Warning: Follow your manufacturer’s instructions exactly as printed. If you don’t, a fire or explosion may result, causing property damage, personal injury, or loss of life.

 Before Operating

Take some time to sniff around the gas fireplace area. Keep in mind that the gas is heavier than air and will settle towards the floor or bottom of the gas fireplace compartment. If you smell gas, immediately turn the valve off and call your gas supplier.

 Also keep in mind that some gas fireplaces have a remote, some have a switch on the unit itself for turning the fire on and off, while others may have a thermostat on the wall.

 Gas Valve, Control Knob, and Igniter Button

Basic Lighting Instructions

Locate the control knob on your gas fireplace. This is typically a knob that has "Off," "Pilot," and "On" printed on it. There will also be a red indicator below, next to the knob, showing which position the knob is in. Make sure the valve is in the "off" position.

 If your gas valve is in the off (closed) position, turn the valve to the on (open) position. Again, take a few minutes to sniff around for any gas leaks.

 Turn the control valve to the “Pilot” position. When you are ready to light the pilot, press the knob and hold it in place. This will start the flow of gas to the pilot.

 Press the igniter button, which is usually next to the control knob. Press the button about once every second until you see that the pilot light has lit. Sometimes the pilot will light right away, and sometimes it will take a few times before the pilot lights.

 Once you have your pilot light lit, continue to hold the control knob down for 15 to 30 seconds to make sure that it stays lit. This time can vary from unit to unit. If the pilot light goes out when you release the knob, repeat the steps until your pilot is lit. If the pilot light will not light, turn the gas valve off and call your gas fireplace service technician.

 Turn the control knob to the “On” position. If you have a switch on the gas fireplace, turn it on to light the burner. If you have a remote, use it to turn the fireplace on.

 Replace any covers you may have removed.

 Summary

Like other gas appliances, if your gas fireplace has a pilot light, there will be specific instructions on how it should be correctly lit. Our best advice? Refer to your owner’s manual or the manufacturer’s instructions on the metal plate previously described.

 As an example, the gas fireplace in my home has no pilot; it is all electronic. When I press the “On” button on the remote, the system electronically lights itself.

 At HomePro Inspections, our home inspectors are trained to inspect gas fireplaces and identify any defects. Any issues are documented in your home inspection report and recommended for resolution by a qualified professional.

 Visit our website to learn more or to schedule your home inspection in the Rochester, Owatonna, and Faribault, MN areas. You can contact us today at (507) 202-8942 or utilize our online “Schedule Now” feature to set up an appointment.

Fresh Air Vents and What They Do to Help Your Home Breathe

Over the years, homes have been built tighter and tighter to help save energy and keep the home warm. More efficient windows and doors, as well as air sealing in newer homes, have reduced random sources of air infiltration to almost nothing. The result is that it is harder for our homes to “breathe.” The more we do to help your home breathe, the healthier the air is for you to breathe.

 If you have gas-burning appliances in your home, such as a furnace, water heater, fireplace, stove/oven, or clothes dryer, they need oxygen to combust. That oxygen has to come from somewhere, and it has to be continuously replaced. Some people think that it doesn’t make sense to have a vent that brings cold air into their home in the dead of winter, but it actually helps because it creates a safer and healthier indoor environment.

 How Do Fresh Air Vents Work?

When explaining fresh air vents to my home inspection clients, I use the example of when I was young and growing up in a 1950’s vintage rambler home. When the furnace kicked on in the utility room, you could feel the cold air scooting along the floor from under the front door in the living room over to the air return across the room. You see, back then, we sat on the hard wood floor to watch the old black and white TV.

 Fresh air vents help our homes and gas appliances breathe easier by bringing the air into the home where it is needed most. Typically, a fresh air vent will be located in the utility or mechanical room where you may have a furnace, water heater, and possibly a gas dryer. Fresh air vents provide the air needed for proper combustion and prevent backdrafting and carbon monoxide buildup.

 Backdrafting

Let’s say, for example, that someone is cooking and running the exhaust vent in the kitchen, the exhaust vents in two of the three bathrooms are being used, and the clothes dryer is running. All of these are drawing air from within your home and venting it to the outside. Now the old water heater kicks on. If the old water heater has a standard atmospheric vent, the exhaust naturally rises up and out of the vent through the roof. Backdrafting is when the exhaust from a combustible appliance, like a water heater, is drawn back into your home instead of naturally drafting out of the roof vent.

 Why Fresh Air Vents Are Important

Without a source of fresh air through a fresh air vent intake, your gas appliances will use the oxygen in your home as fuel. This may also lead to an unhealthy buildup of carbon monoxide. A fresh air vent will provide the combustion air needed for your appliances to run properly.

 Identifying a Fresh Air Vent

During the course of a home inspection, our home inspectors confirm that there is a fresh air vent. The fresh air vent is typically found in the utility room next to the furnace and water heater. Many times, the utility room will also have a clothes dryer and a washing machine.

A Fresh Air Vent in a Utility Room

The fresh air vent will be a 6-to-8-inch duct that extends down to the floor, typically with a loop at the bottom, like the letter “J.” This duct may extend up through the home and into the attic or to a wall vent. Extending the vent to the attic prevents the force of wind from directly blowing into the vent.

 A Fresh Air Vent in an Attic

 What About the Cold Air?

Occasionally, during a home inspection, we will find rags, towels, or foam balls stuck in these fresh air vents in the utility room. Homeowners who do not understand the purpose of these fresh air vents think they are doing the right thing by blocking the cold air they feel coming into the room during the winter. Our home inspectors will explain the reasons for the vent and why the cold air is important.

 Summary

It is important to have clean air in your home to breathe. The good, clean air coming from the outside while the dirty air goes out is a good thing. You can thank your fresh air vent for that. Remember, don’t block that vent, and make sure it is clear to draw air into your home.

 At HomePro Inspections, our home inspectors are trained to inspect your HVAC systems and identify any defects. Any issues are documented in your home inspection report and recommended for resolution by a qualified professional.

 Visit our website to learn more or to schedule your home inspection in the Rochester, Owatonna, and Faribault, MN areas. You can contact us today at (507) 202-8942 or utilize our online “Schedule Now” feature to set up an appointment.


What Is a Water Hammer?

Have you ever heard a banging in your walls when you or another person turns off the water at the sink or tub? The sound can be unnerving and may lead to damage to your home. A water hammer may, over time, lead to a leak or burst pipe in your home.

 When HomePro Inspections performs a home inspection, our home inspectors listen for clues of a potential water hammer as we operate water valves in a home.

 What is water hammering?

Water hammering is the result of a surge of pressure when a water valve is closed suddenly. Water does not compress, so when a valve is closed, the flow is stopped instantly. It’s kind of like walking into a wall.

 A sudden stop in a water line can generate pressure up to three times that of the water flow pressure. That pressure can cause pipes to move, displace, or vibrate within your walls. Over time, that spike in water pressure may cause a leak or burst a pipe, causing water damage over an extended period of time or all at once. Fortunately, a water hammer can be fixed.

 Split water line

This video from “Practical Engineering” does a really good job of explaining what a water hammer is.

 What causes a water hammer?

There are several factors that can cause or contribute to a water hammer. One or more of these could be causing the banging in your walls.

 Water Pressure – High water pressure is one potential cause of a water hammer. The higher the pressure of the flow of the water, the higher the pressure when that flow is suddenly stopped at a valve.

 Appliances – Appliances that use water, such as a washing machine, dish washer, and even the water dispenser/ice maker on the refrigerator, can cause a water hammer. The water valves on these types of appliances shut off quickly.

 Watch the flexible water supply hoses on the washing machine or the coil of copper at the back of your refrigerator when the water is shut off. The flexibility in these lines helps to absorb some of the energy, but they can still shake, move, or wiggle quite a bit when the valve is shut off.

 Loose Pipes – Having some flexibility in the water lines in your home can help with dampening a water hammer’s energy. If they are in contact with your walls or structure, you may hear banging. Modern PEX water lines do a better job at dampening than rigid copper water lines. However, too much movement in rigid copper water lines may result in cracked solder joints and leakage. Long runs of copper water line with minimal support are prone to excessive movement.

 Leaking joint at the elbow

 Old Plumbing Systems – Because older water plumbing systems lack modern plumbing standards, they can be prone to water hammer. Sometimes, during a home inspection in an older home, our home inspectors will find bladder tanks and pressure relief valves in the water supply system. These devices will help to mitigate water hammering.

 Fixing a water hammer

There are several possible solutions to eliminate a water hammer problem. Depending on the issues you may be having with your plumbing system, one or more of the following fixes may be needed to eliminate a water hammer in your plumbing system.

 Water Pressure Regulators – Managing the water pressure within your plumbing

system with a water pressure regulator can prevent surges or higher water pressures.

 Water Hammer Arrestors – These devices are installed in your plumbing system to absorb the shock in a water line when the flow suddenly stops due to the fast closing of a valve or faucet. Within the water hammer arrestor is basically a pocket of air or a bladder that will compress and absorb the higher water pressure when the water flow is suddenly stopped.


Below is a photo of a washing machine outlet box with water hammer arrestors integrated into the design. Washing machines, dishwashers, and refrigerators have valves that close quickly. Installing a water hammer arrestor in close proximity will eliminate a water hammer.

 Water Hammer Arrestor                     

Air Chamber/Bladder Tank – These are not as common. Our home inspectors come across air chambers and bladder tanks in older homes as a retrofit to older plumbing systems. They provide extra space for expansion and absorption of water pressure changes.

 Air Chamber/Bladder Tank

Pressure Relief Valves – These devices use an internal spring within the valve. Higher than normal water pressure will overcome the spring force and open the valve. Any water released can be routed to a drain.

 Pressure Relief Valve

 Loose Plumbing – Any loose plumbing should be secured to your home’s structure to keep it from banging. Although this may not be the root cause of the banging, securing pipes will help reduce the potential for cracking or loosening of any solder joints.

 Summary

Water hammers are at the very least annoying, depending on their proximity and loudness. In a worst-case scenario, if a leak develops and goes undetected for a period of time, it can result in serious water damage.

 At HomePro Inspections, our home inspectors are trained to inspect plumbing systems and identify any defects. Any issues are documented in your home inspection report and recommended for resolution by a qualified professional.

 Visit our website to learn more or to schedule your home inspection in the Rochester, Owatonna, and Faribault, MN areas. You can contact us today at (507) 202-8942 or utilize our online “Schedule Now” feature to set up an appointment.

Knob-and-Tube Wiring and Some Things You Should Know

When performing a home inspection on older homes built from around 1880 to the 1940’s, one of the things our home inspectors are on the lookout for is knob-and-tube wiring. Knob-and-tube wiring is the black cloth-covered wiring that was installed using the white ceramic “knobs” and “tubes” to support it and to protect it where it runs through wood.

Knob-and-tube in a wall cavity

 What is knob-and-tube wiring?

wiring system used in the early days of bringing electricity into homes. Knob-and-tube wiring isn’t inherently dangerous given its original conditions; however, it is a potential fire hazard and considered outdated by today’s standards. Many times, the initial installation of knob-and-tube wiring has been altered, added to, or covered with insulation in the attic space.

 How to identify knob-and-tube wiring

Knob-and-tube wiring is usually found in attics and unfinished basements or crawl spaces. This wiring is typically insulated in a black cloth-like material, is wrapped around ceramic knobs, and passes through ceramic tubes in the home’s framing. The hot and neutral wires are both black and run parallel to each other. Splices were done by removing a portion of the insulation, pig tailing or wrapping the spliced wire, and soldering them together. The splice was then heavily wrapped with cloth-like electrician’s tape.

Knob-and-tube with white insulation

 The potential dagers of knob-and-tube wiring

·         Unlike modern wiring, knob-and-tube wiring is not grounded. Grounding of electrical wiring in homes started in the 1960s.

·         Do-it-yourself or improper modifications may have been made over time. Sometimes these modifications were not soldered at splices, or the bare wires were left exposed. 

·         Modifications are prone to overloading the original circuit design. Adding to circuits to support modern electrical needs can overload knob-and-tube systems, resulting in fire.

·         There could be missing insulation, either due to rot and decay over time or from rodents chewing on the wires. Exposed wiring may lead to electrical shock or death.

·         Covering knob-and-tube wiring with insulation in attic spaces or walls does not allow heat to dissipate. This type of older wiring has a higher electrical resistance and will become too hot, possibly resulting in a fire.

·         Knob-and-tube wiring will become unreliable over time. Take notice of lights that flicker, warm switch plates, or sparks when plugging or unplugging devices at outlets.

Knob-and-tube in an attic space

 How does knob-and-tube wiring affect your insurance?

Obtaining insurance may be difficult if you have knob-and-tube wiring in your home. Some insurance providers will offer additional coverage for homes with knob-and-tube wiring, while others will deny coverage outright. Due to the increased potential for fire and damage to your home and personal belongings, insurance coverage for a home with knob-and-tube wiring may have higher premiums.

 Summary

Replacement of knob-and-tube wiring is not required by code, but if you have this type of wiring in your home, for safety’s sake, you should seriously consider having it inspected by a licensed electrician. When performing a home inspection, our home inspectors will clearly note knob-and-tube wiring in your home inspection report. Our practice is to “recommend further evaluation for adequacy and safety” by a licensed electrician. An electrician will be able to tell you if you have a hazard or not and if the knob-and-tube wiring needs to be replaced.

 At HomePro Inspections, our home inspectors are trained to inspect electrical systems and identify any defects. Any issues are documented in your home inspection report and recommended for resolution by a qualified professional.

 Visit our website to learn more or to schedule your home inspection in the Rochester, Owatonna, and Faribault, MN areas. You can contact us today at (507) 202-8942 or utilize our online “Schedule Now” feature to set up an appointment.

What Is a Heat Pump and How Does It Work?

You may have heard the term “heat pump” from your home inspector or HVAC technician, but aren’t really sure what it means. Heat pumps look like an air conditioning unit, and they do work like A/C for cooling, but they also work in reverse to heat your home. To help you understand, let’s discuss exactly how they work and what the major components and benefits of a heat pump are.

 What is a heat pump?

A heat pump works like an air conditioner during the cooling season. In the heating season, it can be switched to work in reverse. Simply put, when in cooling mode, it cools the inside and pumps the heat to the outside of your home. When in heating mode, the heat pump pulls heat from the outside environment and pumps it to the inside of your home.

 In technical terms, a heat pump basically transfers heat from one environment to another. This is done when the heat pump is part of your HVAC system. The heat pump does not generate heat, but rather pulls the heat from the outside air, a water source, or a geothermal source.

 Even in the winter, there is latent heat outside. However, for most systems, a heat pump using outside air does not operate efficiently when the temperature drops below 40 degrees.

 What are the benefits of a heat pump?

Heat pumps only use electricity to move air through the system. This makes them efficient and cost-effective. Depending on where you live, compared to an electric resistance furnace or baseboard heaters, a heat pump can reduce the electricity used to heat by as much as 50%. Newer high-efficiency heat pumps do a better job at reducing humidity as compared to an air conditioning system. For more information on heat pumps and to see how they may help you save energy, visit this energy.gov website.

 What are the components of a heat pump?

There are several components to a heat pump system. Below is a description of the major parts.

 ·         Exterior Unit - The exterior unit of the heat pump is typically called the air conditioning or A/C unit. This is the familiar unit you see that has the housing, fan, copper coil system, and cooling fins. The fan pulls air in through the copper coils and blows it out of the top of the unit.

·         Interior Unit - The interior unit of the heat pump is typically a part of the furnace system or an air handler. This unit also has a copper coil system and a fan to move air through the coils as well as the distribution ductwork of your home. 

·         Compressor - As the refrigerant moves through the compressor, the pressure is increased, which makes the refrigerant hot. This pressure also helps to move the refrigerant through the coil system.

·         Evaporator - The evaporator is the set of coils housed within the interior unit.

·         Condenser - The condenser is the set of copper coils housed within the exterior unit.

·         Reversing Valve - The reversing valve switches the flow of the refrigerant through the system. In one direction, the system functions as an air conditioner; in the other direction, the system functions as a heat pump.

·         Expansion Valve - The expansion valve regulates the refrigerant pressure and temperature within the system.

·         Refrigerant - The refrigerant is the liquid or gas that is contained inside the copper coil system. The coil system is a continuous loop connecting the exterior and interior units. The refrigerant may also be called freon, 410A, or R22. Although it is called a refrigerant, it is actually a liquid or gas that transfers heat or cold. It can easily change temperature from very cold to very hot by adjusting its pressure.

 How does a heat pump work?

In general, a heat pump uses electricity and its components as a way to transfer heat from one environment to another through a medium we call refrigerant. Using a fan, the heat or cold within the refrigerant is transferred from the coil system to the air around it. Along with the fan, a distribution of ducts moves the air to the desired areas of your home.

 Cooling Mode

In the cooling mode, the refrigerant moves through the compressor in the outdoor unit coil system. This creates a higher pressure in the refrigerant and converts it from a liquid to a very hot gas.

 The coil system in the exterior unit functions as a condenser, and the fan in the exterior unit pulls cooler air through the coil system. The refrigerant absorbs the lower temperature, which lowers the refrigerant pressure and transfers the heat to the exterior atmosphere.

 As the refrigerant travels through the system, it passes through the expansion valve, which regulates the pressure. The lower pressure converts the refrigerant back to a liquid, which becomes very cold. As the cold liquid flows through the interior unit’s evaporator coil, the fan moves warm air across and through the coils, cooling and dehumidifying the air, which is then distributed throughout the home.

 Heating Mode

When in the heating mode, the reversing valve is switched, thus reversing the entire system. The refrigerant travels through the compressor, making it a hot gas. As the hot gas travels through the interior unit coil system, the fan blows air across the coils to heat the air.

 The refrigerant absorbs the cooler indoor air through the coils and the pressure lowers. As the refrigerant travels through the expansion valve, it becomes a cold liquid.

 As the refrigerant passes through the coil system of the exterior unit, the fan draws warmer air through the coils and back through the compressor, making it very hot.

 Summary

Heat pumps are an efficient way to heat and cool homes, but they have their limits depending on if they are using air, water, or geothermal as their heating or cooling source. If using air in the northern states, it is not uncommon for a heat pump system to have a backup electric induction heat source in the furnace for when temperatures are consistently below 40 degrees.

 At HomePro Inspections, our home inspectors are trained to inspect heat pump systems and their operation. Any issues are documented in your home inspection report and recommended for resolution by a qualified professional.

 Visit our website to learn more or to schedule your home inspection in the Rochester, Owatonna, and Faribault, MN areas. You can contact us today at (507) 202-8942 or utilize our online “Schedule Now” feature to set up an appointment.

Understanding Reverse Polarity in an Electrical Outlet

Reverse polarity may not seem like a big deal, but it is. What this means is that an electrical outlet or light fixture is wired backwards. There is a “hot” side and a “neutral” side to these electrical fixtures, and it is important that the wiring is connected correctly. Although the circuit will still work if wired backwards, having the hot and neutral reversed can create a dangerous situation most people are never even aware of.

  How do electrical outlets and light fixtures work?

We should probably understand how an electrical outlet and light fixture work before moving on to reverse polarity. Basically, they are designed for electricity to run through them in a certain way. Let’s use the kitchen sink as an analogy. Water is supplied by the faucet (hot side) and exits through the drain (neutral side).

 Electrical Outlets

When you look at an electrical outlet, you will notice that one of the slots is longer than the other. The slot orientation determines the polarity. The shorter slot is the hot side, also known as the ungrounded conductor. The long slot is the neutral side, also known as the grounded conductor. The little “doghouse” at the bottom is the ground wire, which is literally connected to the earth. If the electrical outlet is wired correctly, the hot side will have a black or red wire attached to it, and the neutral side will have a white wire attached to it. The ground is typically a bare copper wire.

 Why does reverse polarity matter?

Let’s say, for example, that you have a lamp plugged into an outlet. In a properly wired electrical outlet, the hot wire is connected to the lamp’s switch. Until the switch is turned on, there is no power to the lamp socket. Once the switch is turned on, the power will travel through the hot wire to the lamp socket, lighting the bulb, then to the neutral conductor.

 Wired backwards

If the electrical outlet is wired backwards, meaning reverse polarity, the hot wire is connected to the socket, not the switch. This means that the socket would have power all the time, even if the switch is turned off. In the event that someone is changing a light bulb, all it would take to complete the circuit to ground and get a shock is to touch the metal in the light socket.

 Example

Another example would be your toaster. If it’s plugged into an electrical outlet that has reverse polarity, the power would go directly to the toaster coils (the part that gets red hot when toasting), even when the toaster is switched off. So, you put in some bread, turn the toaster on, the circuit is completed, and all seems fine. Your bread toasts, the switch turns off, and the coils are no longer red. But let’s say your toast gets stuck. You grab the butter knife, slip it into the toaster to dislodge the toast, but accidently come into contact with one of the coils. Boom! You get a shock! You have become the ground conductor! If the electrical outlet was wired properly, the power would be at the switch and the coils on the neutral side of the circuit.

 As a homeowner, how do I check for reverse polarity?

An easy way to check the outlets in your home for reverse polarity is to purchase an outlet tester. These handy little devices are relatively inexpensive, easy-to-use, and can be purchased online or at a local big-box home improvement store. The indicator lights on the tester will show if an outlet is wired correctly, has an open ground, an open neutral, an open hot, or is hot/ground reversed or hot/neutral reversed (reverse polarity). If the tester indicates there is a problem, you should call an electrician to recheck the outlet and make repairs as needed.

 Summary

Although an incorrectly wired electrical outlet may seem like a small thing, it can be a hidden danger that can cause electrical shock, serious injury, or worse. When performing a home inspection, our home inspectors check every outlet they can safely reach and document any of the above-mentioned issues.

 At HomePro Inspections, our home inspectors are trained and always look for electrical outlet and switching issues when inspecting a home. All issues are documented in your home inspection report and recommended for resolution by a qualified professional.

 Visit our website to learn more or to schedule your home inspection in the Rochester, Owatonna, and Faribault, MN areas. You can contact us today at (507) 202-8942 or utilize our online “Schedule Now” feature to set up an appointment.

Oh No, I Have a Water Leak!

Water damage to your home can be overwhelming. Whether the water leak is a burst pipe that quickly floods your basement or a faucet or toilet that has been leaking for a while and you just discovered it. This is stressful, and it’s hard to know what to do first. Most of the time, you start by shutting off the main water supply. Sometimes you grab a bucket to contain the water leak and shut off the water source to whatever is leaking.

 After the initial shock and resulting stress, you immediately go into damage control. It’s hard to know what to do first or where to start. Well, for me, having years of experience in process engineering and project management before becoming a home inspector, I jump right into risk management. It’s a curse!

 Let’s Start by Assessing What Type of Water Leak You Have

 Low Damage – Low Cost

These types of leaks usually don’t cause damage, but instead are inconvenient, and they can cost you time, money, and energy to locate the source. There is a water leak somewhere, and you are wasting water. These costs can add up to a lot of money on your water and sewer bill. Maybe it’s a toilet that is rarely used, the sprinkler system, or perhaps the water softener. It may be hard to pinpoint, but you can hear water running in the pipes somewhere in your home.

Water Meter

  Where to Start

Check and shut off all hose bibs, interior faucets, showers, and sprinkler systems. 

Turn off anything and everything that has a faucet or valve and uses water. Once you have done that, if you still hear water running, you have to systematically search for the source of the water leak. This can take some time and vary in level of complexity, depending on your home.

Locate and check your water meter.

Once the previous water sources are shut down, locate and check your water meter. Water meters vary, so you may see something like an odometer. Some water meters have small dials, or icons, that will indicate low flow. Learn more about how to read a water meter here. If the indicator indicates flow, you still have a water leak somewhere in your home.

Shut down your toilets.

Water leaks from your toilets are typically the most common source of non-damaging water leaks. Turn off the water source to your toilets one by one and check the low flow indicator on your water meter. If the indicator has stopped after shutting off a particular toilet, you’ve found the culprit. If the indicator still shows a low flow, you still have a water leak.

Shut down all other water-using appliances.

One by one, shut down any other appliance or device that uses water in your home. Continue as you did with the toilets until you find your water leak. If the water leak is still undetectable, maybe it’s time to call your favorite plumber.

Moderate Damage – Moderate Cost

Moderate damage water leaks are the ones that don’t seem like a big deal, but if they go unnoticed or are ignored, they can result in significant damage over time. It could be a small water leak next to a shower stall, the drip from the dish washer or sink, or that wet spot on the basement ceiling. These may not look like a big deal on the surface, but they could be developing into a much bigger issue within your walls or ceilings.

Water leak at basement ceiling and wall

 If you notice a new water leak, deal with it right away. Repeated and continuous water leaks, even if they appear to be small, typically don’t go away on their own. Ignoring them can be a big mistake.

 Where to Start

Turn off the water source.

Determine if the main water valve needs to be shut off, or if you can stop the leak with another valve closer to the source.

 Clean up the mess immediately.

If you catch a water leak soon enough, the mess may be minimal, but you should clean it up immediately. Failure to dry up a water leak can result in mold or mildew. Disinfect the area if possible and get a fan and/or dehumidifier going as soon as you can.

 If any organic growth has started, be conscientious and take precautions to minimize spreading mold spores throughout your home. Protect yourself by wearing the appropriate protective clothing if you are to handle anything that may be dangerous. As my dad used to say, it’s better to be safe than sorry!

 Resolve the leak at its source.

Determine exactly where the water leak is originating. Replace or fix whatever is leaking and make sure that any damaged or corroded components are replaced. Take the time to analyze other components that may be suspect or waiting to be your next water leak.

Split water li ne

Significant Damage – Significant Cost

Most homeowners may never have a water leak that falls into this category. These types of water leaks can be catastrophic and result in a great deal of damage to your home. As an area of your home may be flooded, these types of water leaks are pretty obvious. Frozen or burst water lines have the potential to pump a lot of water into your home in a short amount of time. Immediate attention is necessary for this type of water leak once it is discovered.

Basement water leak

 Where to Start

Turn off the main water valve.

Everyone old enough to understand should know where the main water valve is located in your home. Shut it off immediately. If the water leak is before the main water valve, you will want to call a plumber or your city water utility company. You may also want to turn off any electrical circuits in the affected area to prevent electrocution.

Document the damage.

Before you do anything else, document everything by taking photos and videos of the damage. Again, turn off any electrical circuits that may pose an electrocution hazard. Thorough documentation will go a long way towards minimizing your loss when working with your insurance company.

Contact your insurance company.

As soon as reasonable, you should contact your insurance company to report the damage to your home. They need to be aware of the water issue and may be able to guide you to the appropriate actions and sources for remediation.

 Get started on the cleanup, but take care not to do anything significant before the insurance company has a chance to assess the damage. Ask them for direction and make sure to wear rubber boots, gloves, and any other protective clothing and gear you need to minimize any chances of injury.

Summary

Take immediate action if you notice something is leaking in your home. Knowing the extent of a water leak and quickly mitigating the damage is an important first step.

 At HomePro Inspections, our home inspectors are trained and always look for past or active water leak issues when inspecting a home. Any issues are documented and recommended for resolution by a qualified professional.

 Visit our website to learn more or to schedule your home inspection in the Rochester, Owatonna, and Faribault, MN areas. You can contact us today at (507) 202-8942 or utilize our online “Schedule Now” feature to set up an appointment.

Locating The Main Water Valve in Your Home

Experiencing a major water leak is probably a homeowner’s worst nightmare. Knowing where your home’s main water valve is located and how to shut it off is crucial for everyone living in your home.

 Where do I start the search?

The most common place for the main water valve is in the basement utility room. For homes built on a crawlspace, you will most likely find the main water valve near the access. In a home that is built on a slab, the main water valve is usually in the utility room or utility closet.

 For relatively newer homes built in the city, the utilities typically enter the home on the street side. Sometimes, in older neighborhoods, the utilities come from the alley side of the home. In rural homes with wells, the main water valve is typically located in the utility room at the pressure tank.

 In newer homes, the valve may be labeled by the builder, but that is not always the case. In older homes, it can be a treasure hunt when looking for your main water valve. If the main water valve is not in the utility room, we may find it hidden in a cabinet, under the bathroom sink, or behind a secret panel. When our home inspectors perform a home inspection for you, we locate the main water valve and tag it with a label.

 What does the main water valve look like?

Typically, the main water valve is a ball valve or a gate valve.

 Ball valves have a ¼ turn handle, usually dipped in a colored plastic that gives them a good grip material. This type of valve is what is standard in modern home construction. This type of main water valve is operated by turning the valve a quarter turn to the right to shut off the water supply. If the handle is in line with the piping, the valve is open. When closed, the handle will be perpendicular to the piping.

  Ball Valve

 Gate valves are an older style of main water valve. They look kind of like a hose bib spigot. This type of water valve turns to the right to close and to the left to open. Gate valves control the flow by pushing a rod, or “gate,” into the water flow opening. Over time, the seals on gate valves can dry out and deteriorate, and our home inspectors find a lot of these older main water valves are leaking and corroded. We recommend replacement in our home inspection report. If you do have a water leak, you want your main water valve to work, right?

Gate Valve

 Some more clues.

If you live in the city, you may find what is sometimes called a “curb stop.” It will look like a small metal cap about 3 to 4 inches in diameter, either in the driveway or near the curb in the grass. A curb stop will indicate which side of your home the water line is coming from.

  Curb Stop

  Again, if you live in the city, you will have a water meter that the city uses to determine and charge you for your water usage. The water meter will be near the entry point of the water line coming into your home.

  Water Meter

In rural homes, if you have a well, the water main typically enters the home from the side that the well is on. Once in the home, you will find a pressure tank, which is typically blue in color. The main water valve will be the one between where the water line comes into the home and the tank.

  Pressure tank with main water valve

 In Summary

It may not seem like a big deal, but knowing where your main water valve is located will save you time and potential water damage in the event of a major leak or a frozen water line in the winter. While we have described the most common types of main water valves found in homes, there may be other styles. Some of these main water valves may require a wrench to turn them on or off. If this is the case, make sure you have a wrench readily available in case you need it.

 When HomePro Inspections performs a home inspection for you, your home inspector will share the location of the main water valve with you and put an identification tag on the valve so you can easily find it.

 
Visit our website to learn more or to schedule your home inspection in the Rochester, Owatonna, and Faribault, MN areas. You can contact us today at (507) 202-8942 or use our online “Schedule Now” feature to set up an appointment.

Manufactured Stone Veneer, “The Inside Story” ... (See what I did there?)

Over the last several years, builders have been using manufactured stone veneer, which has become quite popular as a modern and attractive siding material on homes. This product was developed to replace natural stone and is manufactured from molded concrete to look like the real thing. This siding product is designed to be installed over wood framing.

Kick out flashing at top cap, mortar at adjacent siding

Decorative Siding

 This decorative siding product became popular in the late 1990s as a replacement for natural stone veneer. Natural stone was inconsistent and therefore difficult and expensive to install. As it is with most new products, the procedures and installations have changed over the years. Fundamentally, the basic process is the same when installing natural stone or stone veneer. Stone veneer is typically adhered to the side of the home using an attachment system of metal anchors and mortar.

 Brick Veneer

Similar to a brick veneer, the home’s structure behind the stone veneer is typically a wood-framed wall with sheathing. Improper installation of the stone veneer will allow moisture to intrude behind the material where it can negatively impact the framing materials and structure of your home.

 How do these problems start?

Typically, manufactured stone veneer is installed over the wood sheathing, or house wrap, on the exterior of the home. Over time, due to the cement and mortar used and because stone veneer is permeable, water can intrude through cracks and openings or seep through the material. If water gets behind the material and has nowhere to go, that’s where the problems begin. This is a similar situation that can result in water damage with EIFS stucco.

 Water Damage

When water finds its way to the substrate or sheathing of the wall behind the manufactured stone, it begins to cause moisture damage, delamination of the sheathing, and mold and/or other organic growth in the wood. Once water is behind the stone veneer, if it doesn’t have a way to exit, that's where your problems begin.

 Why are we still installing this product?

Since the 1990s, manufacturers and builders have learned how to better install these products, thus improving installation methods and practices. The best solution for water getting in behind this stone veneer is to ensure it has a path out at the bottom. Significant improvements have been made with the experience manufacturers and builders gained from stucco and EIFS water issues. By improving drainage requirements and installation methods, newer installations have far fewer problems with this product.

 Kickout Flashing

When performing a home inspection, our home inspectors are looking for kickout flashings on the top edge of the stone cap, drainage planes, and a weep screed at the bottom of the stone veneer. We also check to make sure that there are no cracks, gaps, or missing mortar. At the vertical edges where the stone veneer meets other siding materials, we make sure there are no gaps or openings.

Weep screed and gap at adjacent siding

 What if I have an earlier installation?

Since the beginning of time, builders have tried new products and learned from their mistakes. It could be asbestos, shingles, EIFS stucco, aluminum wiring, electrical panels, and the list goes on and on. This means that there could be hundreds of thousands of homes that have the potential for moisture problems if the stone veneer was not installed properly or maintained correctly. Either through failure or issues brought forward as a result of a home inspection, over time, these older installations are eventually replaced.

 In Summary

If you have stone veneer on the front of your home, keep an eye out for signs of water intrusion. Look for loose stones, cracks, and openings or gaps between the stone veneer and the adjacent siding. Efflorescence, which is a white chalky powder, could also be a sign that there is water behind the stone veneer. If you hire HomePro Inspections for your home inspection, we’ll make sure to inspect for these issues and report any findings on your home inspection report.

Efflorescence on stone veneer

Visit our website to learn more or to schedule your home inspection in the Rochester, Owatonna, and Faribault, MN areas. You can contact us today at (507) 202-8942 or use our online “Schedule Now” feature to set up an appointment.


Should You Caulk Around the Toilet Base?

We get asked this question a lot by our clients at their home inspection. Caulking around the base of the toilet is recommended but highly debated. We will try to cover the reasons for or against this question and let you decide for yourself.

 First, let’s discuss some reasons for and against caulking around your toilet.

 What the state code says: The 2015 Minnesota State Plumbing Code says, under section 402.2, "Where a fixture comes in contact with the wall or floor, the joint between the fixture and the wall or floor shall be made watertight."

 It looks better:

If you have a tile floor, there may be uneven gaps between the flooring and the toilet base. It may give you a more finished look to have the gap filled with caulking.

 Stabilization:

There may be times when a toilet rocks a little bit because tile flooring may be uneven. You can only tighten the mounting bolts so much before you break the base. Caulking the gap between the toilet base and the floor will help stabilize any rocking.

 That funky smell:

There is the potential for the water used to clean the bathroom floor, or, perhaps, poorly aimed streams, to collect under the toilet base. Because these fluids can never be completely cleaned away, they create the perfect organic soup for all kinds of nasty organisms to grow, flourish, and produce unpleasant odors.

 Now, let's look at some of the reasons why you shouldn't caulk around your toilet base.

Where does the leaking water go?

There’s a lot of discussion with respect to potential leaks under a toilet. Water, in responding to gravity, will generally travel downward and should present as a wet/damp area on the ceiling below. However, if the flooring goes right up to, or in the case of tile, under the mounting flange, any leaks may just simply run out onto the floor. This could also be the case if a basement toilet is installed directly on the concrete floor.

  If the accumulation of fluids is consistent over time, the flooring and structure under the toilet are prone to rot and decay. The photo below shows floor rot adjacent to the toilet mounted in the bathroom above.

 Deterioration is a common find in older homes. We use a moisture meter in the course of a home inspection to check for moisture below toilets if it is accessible.

 Just what should you do?

Considering the pros and cons, I think there is a happy medium that will satisfy all concerns. In my opinion, the toilet base should be caulked. I recommend you leave a small gap at the front and back. This small gap can allow water to escape if the toilet is leaking. If the water spreads out faster than it goes down, the leak can be detected sooner. It secures the toilet base to the floor, and it will help to prevent any water used during cleaning or those “near misses” from accumulating under the base.

 Visit our website to learn more or to schedule your home inspection in the Rochester, Owatonna, and Faribault, MN areas. You can contact us today at (507) 202-8942 or use our online “Schedule Now” feature to set up an appointment.

Radon Gas - What Is It and What Can You Do About It?

What is radon gas?

To keep it as simple as possible, radon (aka radon gas) is a naturally occurring radioactive noble gas produced by the slow decay of radium in the soils under and around your home. Radon gas is colorless, tasteless, and has no smell, and the only way to know if you have radon gas in your home is to test for it.

 Radon gas is considered a carcinogen by the World Health Organization (WHO). The United States EPA considers exposure to radon gas a health risk and has classified it as the number-one cause of lung cancer in nonsmokers. Smokers who are exposed to radon gas have a much greater risk of developing lung cancer. You can refer to the EPA’s “A Citizens Guide to Radon” for more information.

 Where does radon gas come from?

Uranium, an unstable radioactive element, is found in soils across most of North America. As uranium slowly decays, it eventually becomes radium, which in turn, as it decays, transforms into radon. As a gas, radon naturally wants to rise to the surface and does so by following gaps and cracks in the soil.

 EPA

The EPA has developed a map representing the general radon zones across the United States and how radon gas levels can fluctuate across our country. If you really want to dig into the uranium decay chain and how it eventually becomes radon gas, follow this excellent link.

 How does radon gas get into my home?

Because the soils under and around the homes in this area can contain traces of uranium and radium, it’s unavoidable that radon gas will also be present, entering homes through gaps and cracks in basement foundations and floor slabs. The higher the concentration and/or the types of soils under your home, the greater the risk that there will be higher levels of radon gas within the home.

 Older Homes

Older homes were draftier, and their basements were less apt to be used as living spaces in the earlier years of the last century. Newer, modern homes are built to be more energy efficient and resistant to air leakage, which can allow harmful levels of radon gas to accumulate.

 The photo below is from the EPA‘s “A Citizens Guide to Radon”.

 How do I know what the radon gas levels are in my home?

By testing. Testing for radon gas is easy and relatively inexpensive as a first step in determining if you have elevated radon gas levels in your home. Testing consists of placing a radon measurement device in your home for a minimum of 48 hours. This testing is to be done in what is called “closed conditions,” meaning all windows and doors are closed 12 hours before and during the testing period. Normal in and out is permitted, but for the most part, let’s just keep the doors and windows closed during the testing and pretend it’s winter.

 What if the radon gas levels are high in my home?

The EPA recommends installing a radon mitigation system in homes with radon levels of 4.0 pCi/L (picocuries per liter) or more. Radon mitigation systems vary depending on your home, foundation type, and the level of radon gas measurement. A radon mitigation company can design a system that will reduce the radon gas levels in your home, typically below 1.0 pCi/L. Just for reference, ambient radon gas levels are considered to be around 0.4 pCi/l.

 In Summary

More than 50% of the homes in Olmsted and the surrounding counties have unsafe elevated levels of radon gas. Testing for radon gas is easy and is the first step in protecting your family. Once you know the radon gas levels in your home, you can decide on the next steps in mitigating the radon gas if the levels are high.

 Visit our website to learn more or to schedule your radon testing in the Rochester, Owatonna, and Faribault, MN areas. You can contact us today at (507) 202-8942 or use our online “Schedule Now” feature to set up an appointment.


Mold Testing and Guidance

Mold is everywhere, and the key is understanding what the potential levels of mold are in your home and what to do if they are affecting you and/or your family.

 Mold in Your Home

Mold may be present in your home at any time of year. Mold levels can be elevated during a cool, rainy season or during the hot, humid days of summer. We hope that the following guidance gives you a better understanding of the dangers of mold and some of the signs that you may want to pay attention to that indicate mold testing and/or mitigation may be required.

 What is mold?

Mold is an organism that is everywhere. Mold’s job is to break down and decompose dead and dying materials in nature, and it’s found both indoors and outdoors. It’s never completely gone, and its existence is necessary in the grand scheme of things we call nature. 

 Places for Mold

Places like wet basements, crawlspaces, and poorly ventilated attics are susceptible to mold, or “microbial growth.” Areas where there are persistent leaks can also provide the right conditions for mold. These areas may have that familiar damp and musty “basement smell.” You may want to consider mold testing if you have or think you have that damp, musty smell in your home.

 When and why would you want mold testing performed in your home?

If you see what you think is mold in your home, you may want to resolve the source and remediate the problem to prevent unnecessary and harmful exposure to your family. Mold testing afterwards will determine if you have effectively eliminated the issue.

 Effect of Mold on People

Problems may arise with mold when humans are exposed to higher levels of the microbial spores. Mold doesn’t affect everyone the same. People with allergies, compromised immune systems, infants, and the elderly are the most affected by mold exposure. 

 Mold Testing

We do a lot of mold testing for people who are buying new homes and have asthma or other health issues that are affected by high levels of mold in the air. They want to make sure there are no issues before buying and moving into the home.

 Reason for Testing for Mold

Another frequent reason for mold testing is when people move into a new home or have visitors who develop health issues they haven’t experienced outside of that home. We recently did mold testing for a couple that had a young grandchild who was fine everywhere in their home except in the basement. When the child went into the basement, they developed red, scratchy eyes and sneezing.

 Here’s a brief explanation of our mold testing.

Any type of mold growing in your home can cause a health problem, and the effects of mold exposure can differ significantly from one person to another. If you think you have a mold problem in your home, you should consider having mold testing done. Sometimes the problem is obvious, but other times, mold testing or sampling is the only way to determine if there is an actual mold issue.

 After scheduling an appointment, one of our mold technicians will come to your home to perform mold sampling. After discussing any concerns you may have, our technician will inspect the home for any areas that may be a potential problem. 

 Types of Mold Testing

When we conduct our mold testing, there are two types of mold sampling that we may do. The most common is an air sample, which will detect any mold spores that are present in the air of the area being sampled. The other is a swab sample, which will examine any mold microbes that are swabbed from a surface.

 Testing Does Not Determine Mold’s Affect

It must be noted that mold testing alone cannot determine how you or your family will react to or be affected by mold growth in your home. Identifying and removing the source and root cause of the mold spores is the best first step in protecting your family.

 How long does mold testing take, and is it accurate?

Our mold testing procedures and process typically take about 30 minutes or so on average. Most of the time, in addition to the sampling, the visual inspection is fairly routine in nature. Sometimes it takes longer if there are obvious issues and additional sampling needs to be documented. 

 Analysis

After the mold testing is completed and documented, the samples are sent off to a lab for analysis and reporting. The reports detail any molds found in the samples, common areas for their development, and the common symptoms of exposure to the molds identified.

 Microbial Testing

Microbial testing innovations in recent years have greatly improved mold testing results to about 99% accuracy. As long as protocols are followed and there is no user error, the testing laboratory can accurately determine if there’s a mold problem and the types of mold present.

 In Summary

If you think you have a mold problem, you should have mold testing performed in your home. Whether or not it’s an obvious problem or just something in the air, testing should help you to determine if you have an issue. Mold testing is relatively inexpensive and is the first step in determining your course of action.

 Visit our website to learn more or to schedule your mold testing in the Rochester, Owatonna, and Faribault, MN areas. You can contact us today at (507) 202-8942 or use our online “Schedule Now” feature to set up an appointment.

How Do I Know If I Have Mold in My Home?

As homeowners and homebuyers become more educated about home ownership, a common concern they share is whether or not there’s microbial growth, or, as most people refer to it, mold, in their homes. If you have concerns about mold in your home or mold testing, you shouldn’t ignore them.

 Why Should I Get Mold Testing?

As home inspectors, we see a wide variety of mold in our home inspections. Some issues are obvious, such as wet basement walls, under kitchen or bathroom cabinets, or where we see leaking. Other times, it’s a damp or moldy basement smell that alerts the home inspector or homeowner that there may be an issue. There are other times where we’re told by a client that they have someone in the family that gets stuffed up and/or has allergic reactions only when they’re in the basement.

 Wet Areas and Visual Growth

You may want to consider mold testing if you have had flooding or discover an area that has water damage or leaks. Areas that are consistently wet are prone to mold growth in a fairly short time depending on the conditions. You can reduce your risk and prevent potential issues by drying out wet areas within 48 hours. Vacuum up standing water, pull back carpets, and run fans and dehumidifiers if necessary to get the area dried out as quickly as possible.

 Drainage

Managing the source of water intrusion is key. If you have poor roof water runoff management or drainage issues, these should be corrected. I’ve seen too many times where a homeowner has fans and dehumidifiers running in a wet area of a basement where the root cause starts outside and is not addressed.          

Inadequate Ventilation

There are times when your home inspector points out inadequate ventilation in a basement. This could be due to a lack of air returns in each room of the basement. Another common find is that all or most of the supply vents are closed “because it gets too cold in the basement when the air conditioning is running.”

 Air Exchange

Since cold air is denser than warm air, it wants to seek out the lowest area. Lack of ventilation and air exchange can result in humidity levels exceeding recommended levels. There may be times when performing a home inspection that one of our home inspectors walks into a basement where it’s cold, damp, and musty smelling. These conditions will alert the home inspector to look for potential signs of microbial growth.

 Recommendations

The Environmental Protection Agency (EPA) recommends that the humidity levels in a home be kept in the 30% to 60% range to prevent possible mold growth.

 Health Concerns

The presence of mold in a home may or may not cause issues for all people. I once had a home inspector on my team that didn’t need to do mold testing if he was doing a home inspection on a home that had mold in it. On one occasion when I was training him, we entered a home, and within 5 minutes he had watery, itchy eyes and was sneezing. I asked him if he was okay, and he said there was probably mold in the home. Sure enough, we went to the basement, and there were signs of active mold growth on the basement utility room walls. I, on the other hand, had no reaction to the conditions. 

 How Much Exposure is Too Much?

Exposure to an elevated level of microbial growth or mold spores affects everyone differently. People with compromised immune systems, the elderly, the very young, and those with allergies can be prone to issues when exposed to mold. Symptoms can include watery eyes, runny nose, itching, difficulty breathing, wheezing, coughing, headaches, and fatigue. Continued and repeated exposures to poor indoor air quality can develop into more severe reactions over time. Molds such as Aspergillus and Stachybotrys may produce mycotoxins which can be toxic to some people under certain conditions, resulting in serious illnesses.

 Summary

People with potential health issues related to mold exposure should have mold testing conducted as part of their home inspection when buying a new home. If you see the warning signs, have flooding or water intrusion, or detect a damp, musty smell in your basement, there may be microbial growth. You’ll want to test for mold to make sure there are no issues.

 Visit our website to learn more or to schedule your mold testing in the Rochester, Owatonna, and Faribault, MN areas. You can contact us today at (507) 202-8942 or use our online “Schedule Now” feature to set up an appointment.