What Is the Difference Between an Appraisal and A Home Inspection?

This is a question I get occasionally: What is the difference between an appraisal and a home inspection? Sometimes, people are either misinformed or confused about the subject. Take it from the specialists at HomePro Inspections; each process and its outcome are quite different.

 A home inspector and appraiser looking at a home from a different perspective

 A few years ago, a client called and told me that he couldn’t find the value of his new home anywhere on the inspection report. He was concerned that defects were called out and that there was no reference as to how that affected the home's value. After some discussion, he acknowledged that what a friend had told him regarding a home inspection and an appraisal was incorrect and thanked me for explaining the actual differences.

 Both the home inspection and the appraisal are essential steps in the home-buying process. They are also significantly different.

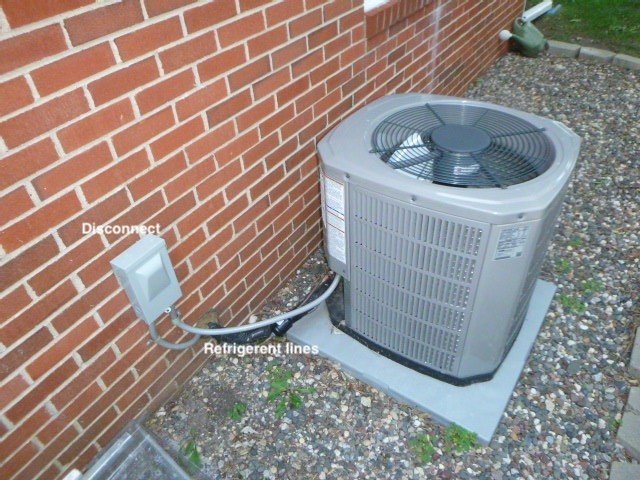
 A home inspection is a primarily visual examination of the home's major structure, systems, and components that are visible and safely accessible. A home inspection helps to protect a home buyer from buying the proverbial “money pit.”

 A home appraisal is a process through which a real estate appraiser determines the fair market value of a home. An appraisal protects the lenders from providing a mortgage that exceeds the value of a property.

 Home Inspection

A home inspection provides a potential home buyer with a nonbiased evaluation of the condition of a home's major systems, structure, and components. For a fraction of the cost of the home being purchased, a home inspection will help to reveal a variety of issues or problems that may be missed by potential buyers. A home inspector is trained to objectively evaluate components of your home and document any defects found in the process.

 At HomePro inspections, we will document any defects found during the home inspection process. In addition, we also document positive attributes of the home. Our home inspectors feel it is important to share what is good about the home.

 The Home Inspection Process

Finding the right home inspector is the first step. Whether you take a recommendation from a friend, a realtor, or from searching online, do your research. Check out their reviews, their experience, and the services they provide.

 There are many considerations when choosing a home inspector. Below are some questions you may want to ask regarding their services:

 ·         What are the home inspector’s credentials and years in the business?

·         Do you have an example of an inspection report that I can review?

·         What do you look at during the home inspection?

·         Can I attend the home inspection?

·         How long does it take to get the completed report?

·         Is the home inspector available for follow-up questions after the home inspection?

 Prior to the home inspection, you should receive an inspection agreement that clearly states the scope of the home inspection. It is essential that you take the time to read and understand your home inspection agreement and sign it before the home inspection is performed.

 Most home inspectors spend anywhere from 2 to 4 hours on site. There are many factors that will affect the length of time for the home inspection, such as:

·         Condition of the home

·         Age of the home

·         Size of the home

 Once you have your home inspection report, you should work with your realtor to discuss how you want to handle any documented issues. Your realtor can guide you with options that may include asking the seller to lower the sale price, requesting resolution on some or all of the issues, or simply walking away from the deal if there are more issues than you bargained for. Again, work with your realtor and their professional recommendations in your negotiations.

 The Appraisal Process

The home appraisal process involves a real estate appraiser walking through and around the home to gather information to help them gauge the home's value. The appraiser’s job is to determine the fair market value of the home.

 If there is a mortgage involved, the bank will require an appraisal. Lenders will make their lending decisions based on that market value. The appraisal protects the lender and you from paying more for a home than what it is worth.

 Depending on the complexity of the home, an appraisal can take anywhere from 30 minutes to several hours on site.

 In addition to the on-site evaluation, the appraisal process involves extensive market analysis and research. The appraiser will look for recently sold homes similar to the appraised home. Location, positive attributes, square footage, amenities, bedrooms, bathrooms, etc., as well as deficiencies or detractors to the property, are all considered in the market analysis.

 Positive attributes may include:

·         Location

·         Schools

·         Landscaping

·         Granite countertops

·         Hardwood floors

·         Other luxuries


Detractors may include:

·         Location

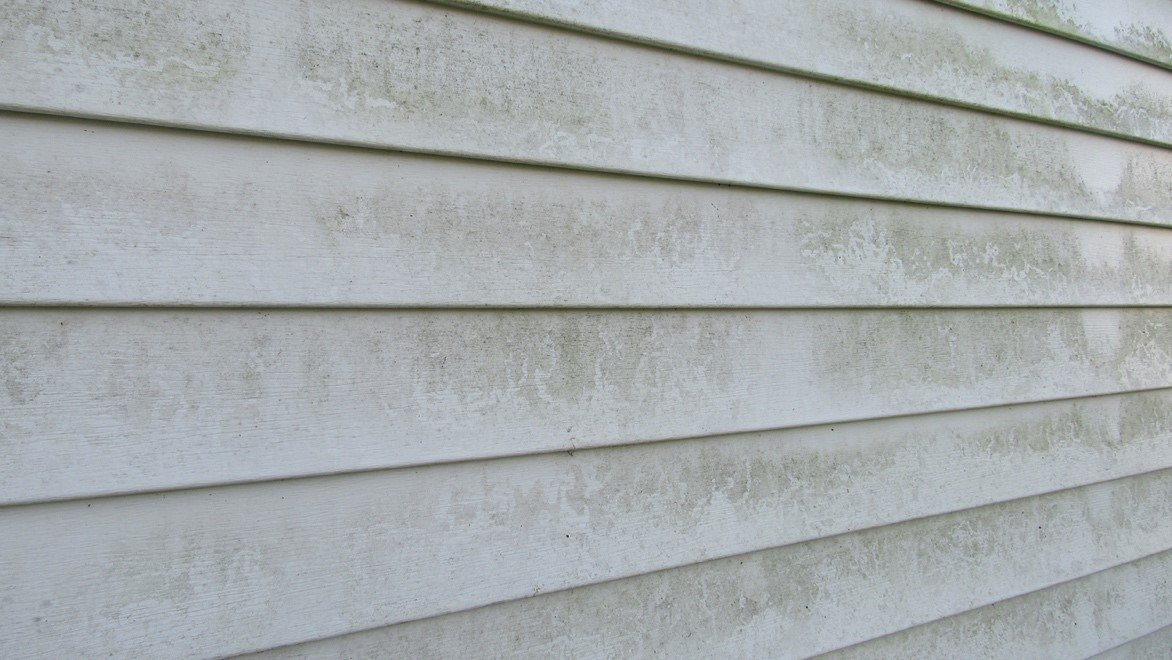
·         Deferred maintenance

·         Lingering pet or smoking odors

·         Water damage

·         Drainage issues

 Summary:

As you can see, an appraisal and a home inspection are two entirely different steps in the home-buying process. Each has its own purpose and is there to protect consumers and lenders. Hopefully, the summaries above will help you understand the differences better.

 At HomePro Inspections, our home inspectors are trained to inspect all areas of the home. Any issues found are documented in your home inspection report and recommended for resolution by yourself or a qualified professional.

 Visit our website to learn more or to schedule your home inspection in the Rochester, Owatonna, and Faribault, MN areas. You can contact us today at (507) 202-8942 or use our online “Schedule Now” feature to schedule an appointment.


Should I upgrade to a Programmable Thermostat or a Smart Thermostat?

In today’s world of ever-evolving smart devices, thermostats are designed to do more than simply maintain your heating and cooling needs. These newer devices can sustain a more consistent environment and help lower your energy bill. If you are thinking of upgrading to a programmable or smart thermostat, HomePro Inspections would like to provide some insight into their differences and potential benefits.

 What’s wrong with a traditional thermostat?

Traditional thermostats only allow you to set a desired temperature in your home. It’s about as basic as you can get. If a temperature change deviates from your setting, the thermostat sends a signal to your HVAC systems. Even if your thermostat is reliable at keeping your home at a set temperature, it may not be the ideal device for your preferred comfort level.

 Technology has given us systems to learn your preferences, know when there is no one home, and adjust your home's temperature and comfort level to meet your preferences and needs.

 What is the difference?

 Programmable thermostat:

·         Allows you to vary the temperature for specific times of the day.

·         Customizable for weekdays and weekends.

·         Automatically adjusts based on your settings.

A Programmable Thermostat

Adjusting your temperature lower during the heating season and higher during the cooling season while you are away at work or sleeping can save you up to 10% on your heating and cooling costs. Programmable thermostats allow you to adjust temperatures to your comfort level before you return home from work or school and wake up in the morning.

 Smart Thermostat:

·         A more intuitive approach to controlling your home’s temperature.

·         It learns your behaviors and adjusts the temperature based on what it learns.

·         Wi-Fi enabled; it adjusts manually using your computer or smartphone.

·         Provides analytics that allow you to monitor efficiency and energy use.

 A smart thermostat

With a smart thermostat, you can access your settings from anywhere and make changes to meet your needs using your computer or a smartphone.

 Your smart thermostat system will generate monthly performance reports showing usage and comparisons based on the month and settings.

 An example of monthly data and usage for a smart thermostat

 Which thermostat is best for me?

Do your homework and research which thermostat will work best for you. Most sources will claim efficiency and energy savings. By using your thermostat’s functions and features, you will see savings with either the programmable thermostat or a smart thermostat.

 Check with your local utility company for potential rebates or incentives that may be available if you switch to a programmable or smart thermostat. Some utilities also offer discounts based on your thermostat type.

 Summary

Whether you install a programmable or smart thermostat, you will see savings in your heating and cooling costs. These devices can save you money and keep your home more comfortable.

 At HomePro Inspections, our home inspectors are trained to inspect all areas of the home. Any issues found with your thermostat or HVAC systems are documented in your home inspection report and recommended for resolution by yourself or a qualified professional.

 Visit our website to learn more or to schedule your home inspection in the Rochester, Owatonna, and Faribault, MN areas. You can contact us today at (507) 202-8942 or use our online “Schedule Now” feature to schedule an appointment.

Maintaining Your Home's Air-to-Air Exchanger

If you own a newer home, chances are that it is equipped with an air-to-air exchanger. Newer homes are constructed to meet higher efficiency standards, meaning they are more airtight and have little or no air infiltration. Your air-to-air exchanger helps keep indoor air clean and healthy. Quite often, our HomePro Inspections home inspectors find that this piece of equipment is overlooked and poorly maintained.

Air-to-air exchanger

Is Your Air-to-Air Exchanger an HRV or an ERV?

There are two common types of air-to-air exchangers. One is a heat recovery ventilator (HRV), and the other is an energy recovery ventilator (ERV).

An HRV recovers heat only, while an ERV recovers heat and has the ability to remove moisture from your home's interior. HRVs are generally more common in the northern part of the country, where the winters are cold and dry. ERVs are more common in the south, where it is more humid.

How do air-to-air exchangers work?

The function of an air-to-air exchanger is simple. The system works by using two fans; one fan draws the air from the home's inside and releases it outside. The other fan draws air from the outside and releases it inside your home.

The air from the two fans passes through a central core in the air-to-air exchanger. This core is comprised of a series of narrow passages that alternate directions, allowing the inside and outside air to pass by each other. Heat is transferred between the passages, while the air streams are not allowed to mix with each other.

For example, in the winter, the warm, stale air from inside your home passes through the heat exchanger core in one direction, while the cold air from the outside passes through in the other direction. The warm air warms the cold air as it passes through the heat exchanger core. Any excess moisture will condense on the core and drip into a tray at the bottom of the unit. A drain tube is routed to a drain.

Maintaining your air-to-air exchanger is important.

Most air-to-air exchangers have their recommended cleaning and maintenance printed somewhere on the system, typically on the core or inside cover.

Filters: Dirty and clogged filters lower the efficiency of your air-to-air exchanger, resulting in restricted airflow. It also makes the fans work harder and uses more electricity to move the air through the system.

Dirty filter at the exchanger core

Filters should be cleaned or replaced per the manufacturer's instructions, typically every 2 to 3 months. The filters can be pulled from the unit and vacuumed to remove dust and debris. You can also soak the filters in warm, soapy water and then rinse them clean. Let them dry before returning them to the unit.

Heat exchanger core: Refer to the owner’s manual for specifics on cleaning the core. The core can be removed from the unit for cleaning. In most cases, vacuuming the core or using compressed air to blow any debris from the core is sufficient. You can also soak it in warm, soapy water and then rinse it clean. Let the core dry before returning it to the unit.

Condensate tray and drain: If your air-to-air exchanger has a condensate tray and drain, it will be located at the bottom of the unit. Clean up any debris or deposits using warm, soapy water, and rinse. Check to see that the drain hose is free from debris and that it drains freely to a drain.

Ducts and interior: Vacuum any debris from the ducts and interior of the unit. Wipe surfaces with a warm, damp cloth.

Fans: Remove any accumulated dirt or debris by gently brushing the fan with a soft brush.

Outdoor intake and exhaust vents: Remove any obstructions that may be blocking the intake and exhaust vents. What we generally find is wasp or hornet nests, leaves, or just ambient dust and debris. Don’t forget that frost and snow can build up during the winter months. It is important that your air-to-air exchanger has adequate airflow into and out of the unit.

Dust and debris at the air-to-air inlet duct

Summary

When operating correctly, the air-to-air exchanger in your home will keep your indoor air clean and healthy. Keeping it maintained is easy and takes little time. During the course of a home inspection, our home inspectors find, more often than not, that this piece of equipment is not maintained. The result is poor indoor air quality and higher operating costs.

At HomePro Inspections, our home inspectors are trained to inspect all areas of the home. We inspect air-to-air exchangers to see that they are maintained and that they appear to be operating correctly. Any issues found are documented in your home inspection report and recommended for resolution by yourself or a qualified professional.

Visit our website to learn more or to schedule your home inspection in the Rochester, Owatonna, and Faribault, MN areas. You can contact us today at (507) 202-8942 or use our online “Schedule Now” feature to schedule an appointment.

Cloudy Windows and Damaged Thermal Seals

You have probably seen a cloudy window in your home or someone else's home. Sometimes, it’s only cloudy when the sun shines on it, or perhaps it looks cloudy all the time. You try wiping it away from both sides of the window, but you discover that the cloudiness is on the inside, between the panes of glass. That cloudiness is the result of a damaged thermal seal, and the inspectors at HomePro Inspections often come across this type of window problem during our home inspections.

 A cloudy window with a damaged or failed thermal seal

 Thermal Seals

Modern windows typically have two panes of glass, and sometimes three. These windows are designed to be more thermally efficient and are referred to as Insulated Glazing Units (IGU). An IGU consists of two or more panes of glass separated at the perimeter by a thermal seal, with an inert gas such as argon or krypton injected between the panes. The thermal seal is airtight and keeps the inert gas from escaping.

 Over time, these seals can fail due to deterioration, damage, improper installation, or factory defects. Once a seal fails, the inert gas can leak away, allowing ambient air to enter the space between the glass panes. The IGU will expand and contract due to temperature changes and exposure to sunlight. This can be likened to a bellows, drawing ambient air in and blowing it out. The ambient air contains moisture that will deposit on the interior surfaces of the IGU. Over time, the moisture builds up on the inner glass surfaces, resulting in a cloudy window.

 Moisture condensation between the glass panes of a window

 Depending on the extent of the thermal seal leak, we see windows that vary in severity from light to heavy condensation and different levels of fogginess. This is an aesthetic issue, as no one wants to see cloudy windows.

 Repairing a damaged thermal seal

The first thing to do is to refer to your window manufacturer's warranty. Many window companies warranty their products with 10- to 20-year or lifetime warranties that may cover partial or complete replacement costs.

 If a warranty no longer covers your windows, it’s time to call a door and window specialist. These folks can determine the extent of the damage and recommend a proper course of action for the required repairs.

 A complete window replacement is usually unnecessary if the only defect is a cloudy window due to a damaged thermal seal. Many windows are designed with the ability to replace only the IGU. The defective IGU is removed from the window unit and replaced with a new one. This is far less expensive and less labor-intensive.

 Diagram of an Insulated Glazing Unit (IGU)

Source: www.thearchitectsdiary.com

 Can I fix it myself?

If you have the required DIY skills, you may be able to replace an IGU yourself. There are resources online that can walk you through the process step-by-step. This can save you a lot of money, but there is no room for error. An improperly replaced IGU can result in wasted energy, time, and expenses. If you have an IGU with damaged thermal seals and you’re not sure if you can properly handle the repairs, your best bet is to hire a professional.

 Defogging

Although not very common, some companies may be able to defog a cloudy window. This process is done by drilling one or more tiny holes in the glass to remove moisture between the IGU windowpanes. This process can remove the moisture and cloudiness but does not restore the thermal efficiency of the IGU because the inert gas cannot be added back.

 Summary

Windows are inspected inside and out during your home inspection. Our home inspectors come across cloudy windows with thermal seal issues quite frequently. In most cases, the home inspector will document these issues as maintenance items. Other than aesthetics, a cloudy window is not a huge concern. It’s still a window doing what a window does; it’s just not as thermally efficient.

 At HomePro Inspections, our home inspectors are trained to inspect all areas of the home. Any issues found are documented in your home inspection report and recommended for resolution by yourself or a qualified professional.

 Visit our website to learn more or to schedule your home inspection in the Rochester, Owatonna, and Faribault, MN areas. You can contact us today at (507) 202-8942 or use our online “Schedule Now” feature to schedule an appointment.


Preparing Your Home for a Home Inspection

Having a home inspection conducted on your home, whether it’s a pre-listing inspection or a buyer’s inspection, can be a stressful time for a homeowner. Some folks think, “Someone is going to go through my house and pick it apart!” The professionals at HomePro Inspections get it, and we know there are other ways to look at the home inspection process and keep it in a positive light.

 For a homeowner, if you are doing a pre-listing inspection, the home inspection process puts you in control by providing you with a list of items you may want to take care of before listing your home for sale. We’re not there to call your baby ugly; we’re there to help you get your home in tip-top shape. This allows you to take care of things on your own time and as you see fit. Of course, some things may seem picky, but you probably want to ensure everything is corrected.

 You can fix that leaky toilet valve or replace a defective GFCI on your own terms if you have the skills. A prospective buyer may ask for a plumber or an electrician to perform these maintenance issues at a much higher cost. Of course, if any of these tasks are outside your skill or comfort level, it is best to hire a professional.

 Preparing for a home inspection from a home inspector’s point of view means making sure that everything is accessible. If we can’t get at it or operate it, we can’t thoroughly inspect it. The following is a list of things you can do as a home seller to help make the pre-listing inspection process smoother and allow the home inspector to perform their job as thoroughly as possible.

 Make sure all utilities are turned on.

Electricity, gas, and water should be on for the home inspection. Without utilities, there are a lot of aspects of the home inspection that we cannot address. This should be common sense, but we run into it often enough that it is worth mentioning.

 Our Standards of Practice state that we are not required to turn on any utility or light gas pilots. The last thing we want is for something to flood or explode; it may be shut off for a reason. If we are granted permission by a homeowner to turn on a valve and light a gas pilot, we will do so.

 If the utilities are off, we must disclose what we could not thoroughly inspect and recommend that a qualified professional inspect the appliance or system after the utility has been restored.

 Gas pilots

While most newer gas appliances have electronic ignitions, older appliances may have standing pilots that must be manually lit. To test a gas appliance's functionality, we need to see it in operation.

 The most common appliances we come across with unlit pilots include gas fireplaces, water heaters, and garage furnaces. Homeowners tend to shut off gas fireplaces and garage furnaces in the spring, and water heaters are commonly shut off in vacant homes.

 Access

There are a lot of places a home inspector needs access to in order to fully perform a thorough home inspection, some of which most people don’t even think about. Below is a list of the common areas we are sometimes challenged with regarding stored items and access.

 ·         Attics are the most common area that we have trouble accessing. If the access is sealed, it has to be cut open. Although the purchase agreement has a statement allowing us to open attic access panels, people forget and get upset when we cut holes in their homes. Ensuring we have permission and access is a big help for us. If given consent, we will cut the attic access panels open.

 ·         Garages, either detached or attached, need to be accessed during a home inspection. Please remember that we will need a key or garage door opener.

 ·         The electrical panel needs to have adequate access. Home inspectors must safely remove the access panel's front cover. Please ensure that no personal items are stacked in front of the panel. This may include cabinets, shelves, and hanging pictures.

 ·         If your home has a crawl space, please ensure that your home inspector has clear access to it and that it is not locked. Sometimes, we come across access panels that are sealed and nailed shut. If this is the case, we cannot inspect the crawl space.

 ·         Furnaces and water heaters must have unobstructed access to them. The home inspector needs to be able to remove access panels to inspect these appliances.

 ·         Blinds and window coverings should be open to reduce the risk of damage to your window coverings and help the home inspector. Home inspectors occasionally damage poorly mounted window coverings during regular operation, and it can take a lot of time to open and close them.

 ·         Appliances that are functional should be plugged in. If a stove, refrigerator, dishwasher, washing machine, or dryer is unplugged, we will assume it is unplugged for a reason.

 ·         Pets need to be secured. More than once, I’ve had a cat hurry out the door as I entered a home, garage, or crawl space. I once had a pit bull freak out when I turned on my flashlight to look under a kitchen cabinet. Luckily, the homeowner was there to grab the dog before it came after me. They explained the dog was a rescue pet with some past flashlight issues.

 Summary

Ensuring your home inspector has access to all areas of your home will allow them to perform your pre-listing home inspection thoroughly. By providing you with a comprehensive list of any issues in your home, you will have control over how to resolve them.

 At HomePro Inspections, our home inspectors are trained to inspect all areas of the home. Any issues found are documented in your home inspection report and recommended for resolution by yourself or a qualified professional.

 Visit our website to learn more or to schedule your home inspection in the Rochester, Owatonna, and Faribault, MN areas. You can contact us today at (507) 202-8942 or use our online “Schedule Now” feature to schedule an appointment.


How Is a Homeowner to Know the Standard Life Expectancy of the Components in Their Home?

We get many questions about the standard life expectancy of home components at our home inspections. Clients will ask us how long the roof will last, how old the water heater is, how long it will last, etc. These are tough questions to honestly answer because none of us have a crystal ball or can possibly know for sure. I've been to home inspections where the furnace is 48 years old and still running. Running, yes, but not very efficiently. I've also been in homes where the water heater was replaced only four years after the home was built. Clients are always asking their home inspector how much longer they think the roof will last. You never know; there could be a nasty wind or hailstorm tonight!

 Protect your home by staying on top of maintenance and repairs.

Homeownership has many rewards and responsibilities.

When you were younger, it was your parent's responsibility. Maybe, even while you rented in the early days, you never had to think about these things. Now that you've bought a home, you've experienced your first home inspection, moved in, and stepped into a new reality. As time progresses, it seems like you're going to the home improvement store so you can repair or replace things just as often as you used to go to the mall for the fun of it.

 There is an excellent resource that helps eliminate some of the guesswork.

Thanks to years of information gathered from testing and research, the International Association of Certified Home Inspectors® (InterNACHI.org) has put together an extremely comprehensive list for the standard life expectancy of almost every imaginable item that is part of a home. If you’re wondering about a particular item, from A to Z, it’s probably on this list.

 Summary

Although providing estimates of standard life expectancy is not part of the home inspection process, our home inspectors will document deficiencies in your home’s components. In some cases, we will make a note if a component may be at or near the end of its average lifespan.

 At HomePro Inspections, our home inspectors are trained to inspect all areas of the home. Any issues found are documented in your home inspection report and recommended for resolution by a qualified professional.

 Visit our website to learn more or to schedule your home inspection in the Rochester, Owatonna, and Faribault, MN areas. You can contact us today at (507) 202-8942 or use our online “Schedule Now” feature to schedule an appointment.


Common Radon Myths and Facts

But, but, but...

            My home doesn’t have a basement

            My home is on a slab on a grade

            My home is really old

            My home is brand new

            My home is on top of a hill

My home sits on sandy soil

My neighbor’s house tested low

I can seal up all the cracks, and everything will be fine

 My team and I, as home inspectors and radon testing technicians at HomePro Inspections, have heard most of the above rationalizations. Radon gas can be present in any structure, and the excuses above don’t justify not having your home tested. High radon gas levels are found in every state and province of North America. More than 50% of all the houses in Olmsted County and the surrounding areas of Southeastern Minnesota have elevated radon gas levels.

 Performing radon testing on your home is the only way to know if you and your family are exposed to dangerous levels of radon gas.

 Myth: I've lived in my home for a long time, and it doesn't seem to be a problem.

Fact: If you reduce your home's radon gas levels, you will reduce your risk of lung cancer, even if you have lived there for a long time.

 Myth: Passive radon mitigation systems are good enough; I don’t need to do radon testing.

Fact: Passive systems are sometimes good enough if the radon gas levels are low enough. Radon testing is the only way to know if the system works effectively.

 Myth: If my home has high radon gas levels, it will be hard to sell.

Fact: Taking action to fix a home's high radon gas levels can be a positive selling point and, in most cases, does not hinder a sale.

 Myth: Radon testing is expensive, complex, and time-consuming.

Fact: Radon testing is relatively simple. Some people choose to test for radon themselves or hire a licensed radon testing company. Either way, it requires little effort and cost.

 Myth: Radon testing kits are hard to find and are not accurate or reliable.

Fact: Radon testing kits are available from qualified testing companies online or at your favorite big-box hardware stores. Licensed radon testing companies can usually provide results within a week.

 Myth: A radon gas problem in my home would be hard to fix.

Fact: Installing a radon mitigation system or adding a fan to a passive system in your home is relatively simple. Many reputable companies can bring radon gas levels in your home down to acceptable levels.

 Myth: Radon gas only affects homes with basements.

Fact: The type of construction and foundation can affect radon gas levels. However, radon gas can be a problem in all kinds of homes. The geology, construction materials, foundation, and many other factors can affect radon gas levels in your home.

 Myth: Radon gas is only a problem in other parts of the country.

Fact: Radon gas levels vary from area to area and state to state; however, high radon gas levels have been reported in every state and province of North America.

 Myth: My neighbor had radon testing done on his home, and no radon was detected. My home should be okay.

Fact: Radon gas levels vary quite a bit from home to home. The only way to reliably know the level of radon gas in your home is to have it tested.

 Myth: Scientists can’t seem to agree that radon gas is a health problem.

Fact: Some scientists will dispute the actual numbers related to radon gas deaths. The Centers for Disease Control, the American Lung Association, the American Medical Association, the Environmental Protection Agency, and the World Health Organization all agree that radon causes thousands of preventable lung cancer deaths every year. Smokers are 21 times more likely to develop lung cancer when exposed to high levels of radon gas as compared to non-smokers.

 Myth: Everyone should test the water in their home for radon gas.

Fact: Radon gas can enter homes through water use. However, high levels of radon gas in public water systems are extremely rare. The rule of thumb is that it takes 20,000 gallons of water to raise the radon gas level in a home by 1 pCi/l. If you have a private well, test kits are available to test for radon gas in your water.

 Summary

Radon gas can enter your home regardless of the type of construction, and measures should be taken to make your home radon gas-resistant. The only way to know is to test your home for radon gas levels. Radon gas testing can be added to any home inspection or performed as a stand-alone service.

 At HomePro Inspections, our home inspectors are trained to inspect all areas of the home. A properly installed and maintained radon gas mitigation system will protect you and your family from unnecessary exposure to high radon gas levels. Any issues found are documented in your home inspection report and recommended for resolution by a qualified professional.

 Visit our website to learn more or to schedule your home inspection in the Rochester, Owatonna, and Faribault, MN areas. You can contact us today at (507) 202-8942 or use our online “Schedule Now” feature to schedule an appointment.


Holiday Safety Tips from HomePro Inspections

Spending time with family and friends during the holiday means peace, joy, and happiness. One careless mistake, however, can change all that. Sometimes, we get so wrapped up in fun and entertainment that we overlook some basic safety rules. The following items and areas of interest contain safety tips and suggestions that will help keep your holiday season happy and festive for all!

 Holiday Candles

Never leave candles unattended. Extinguish them when you leave a room, go to sleep, or leave your home. A National Fire Prevention Association (NFPA) study shows that candles start more than half of all home fires. Most of those fires happen in December because candles are left burning unattended. Candle safety should be a top priority in your home.

 Never leave candles unattended.

Holiday Decorative Lighting

Check the packaging to ensure whether your lighting can be used indoors or outdoors. Indoor and outdoor lighting and their usage must meet different standards for safety. The same goes for any extension cords you may have to use. Check the packaging to ensure that your lighting has met nationally recognized safety standards verified by testing laboratories such as Underwriters Laboratory (UL). Whether new or old, always check each light string for damage, exposed or frayed wires, and cracked or loose plugs or receptacles. If there is any damage, throw them out or, if available in your community, recycle them. For the utmost safety, outdoor lights should always be plugged into a GFCI.

 Excessive use of extension cords

Always turn your holiday lighting off or unplug them when you are away or asleep. This country has more than 700 fires a year caused by holiday lighting.

 Electrical Circuits

Overloaded electrical circuits start many home fires. Older homes tend to have fewer electrical outlets and circuits than newer homes. Using power strips or adapters that allow you to plug in multiple devices can lead to a fire. Take the time to ensure you are not overloading your electrical circuits.

 Never overload electrical circuits.

 Holiday Cooking and Baking

Cooking and baking fires are the number-one cause of home fires in the United States. The NFPA has reported that one-third of home fires are attributed to unattended cooking equipment. When using the stove or cooktop, be especially careful. Too high temperatures, splattering, towels or other combustibles, and inattention are the leading causes of fires in the kitchen. It is best to remain in the kitchen, even when baking or roasting. Use a timer as a reminder to check on the oven periodically if you are busy with multiple tasks.

 Smoke Alarms

Even though you are supposed to change the batteries in your smoke alarms twice a year when you set the clocks forward and back, you should take the time to check your smoke alarms by pressing the test button and double-checking the battery. If you have a newer smoke alarm with a built-in 10-year battery, at a very minimum, test functionality with the test button. Properly functioning smoke alarms reduce your risk of a home fire death by half.

 Christmas Trees

If you have a natural tree, water it daily. When purchasing an artificial tree, choose one that is fire-resistant. On average, Christmas trees contribute to about 200 fires annually. Use caution when selecting the tree's location and how you decorate it. Keep it at least 3 feet away from any heat sources.

 Fireplaces

There is nothing quite as cozy as relaxing by the fire. With all of the hustle and bustle of the holidays, we can sometimes forget to have our wood-burning or gas fireplaces cleaned and inspected by a professional. This should be done at least once a year. Keep all of your decorations at least 3 feet away from the fireplace.

 Keep combustibles at least 3 feet away from your fireplace.

 Don’t forget to remove those stockings from the mantle when using the fireplace. Also, never throw wrapping paper into a wood-burning fireplace. Wrapping paper ignites rapidly and burns very hot. This could result in excessive flames and heat escaping the burn chamber.

 Celebrate Holidays Mindfully

If you plan on drinking alcohol, make sure that you have a designated driver to get you and your loved one’s home safely. If you are hosting, watch your guests and ensure they have a safe way home. Too many celebrations end in tragedy due to drunk driving accidents during the holiday season. It’s better to be safe than sorry.

 From the entire HomePro Inspections family, our staff and home inspectors wish you a safe, wonderful, and warm holiday season with family and friends.

Visit our website to learn more or to schedule your home inspection in the Rochester, Owatonna, and Faribault, MN areas. You can contact us today at (507) 202-8942 or use our online “Schedule Now” feature to schedule an appointment.

How to Clean Accumulated Hair and Gunk from Your Sink Drains

Cleaning hair and accumulated gunk buildup from sink drains has to be one of the worst maintenance projects. It’s one of those things that no homeowner wants to deal with, and unfortunately, we all tend to wait until we have a sink that won’t drain before we act.

 A sink drain stopper clogged with hair and gunk

The good thing is that this maintenance project can be relatively simple if you act on it with some regularity before it becomes a huge issue. Occasionally, the clog may result in slow draining and gurgling when your sink drains.

 Cleaning and maintenance options for Sink Drains

Luckily, we have a few options for removing hair from your sink drain, with some working better than others. The best approach is to try to inspect what you are up against and take an approach that works for you.

 Vinegar and baking soda

This approach will help to loosen the hair in the clog and help to soften and dissolve the built-up gunk in your sink drain. Create a mixture of one tablespoon of dish soap and a cup of vinegar. Pour a cup of baking soda into your sink drain. Slowly pour the soap and vinegar mixture into the sink drain and let it sit for at least 5 minutes, letting the chemical reaction do its work. While you are waiting, bring about half a gallon of water to a boil on the stove. Pour the hot water down the sink drain. This will usually push most of the loosened-up gunk down the drain. You may need to use a plunger if the water alone doesn’t get the hair and gunk out.

 Tweezers

If you can, remove the drain plug from your sink. Sometimes, they can be lifted out, and sometimes they must be decoupled from the open/closed stem. Use tweezers or needle nose pliers to try and get a hold of the hair clog. Sometimes you can remove the whole clog, and sometimes you need to pull it out a little bit at a time. Check your progress with a flashlight. Once you think everything is removed, you can rinse the drain with boiling water to remove any remaining clog. Replace your drain plug when finished.

 Plumbing Snake for Sink Drains

If you have access to a small plumber snake, this may do the trick for you in cleaning out the sink drain. If not, several options are available for more minor and/or disposable plastic drain and hair snakes at your local hardware or big box store.

 Removing hair and clogs from a sink drain with a plastic snake tool

 Disassemble the drain

If all else fails, you may have to disassemble the drain and sink trap underneath the sink to remove the clog. You can do an inspection of the insides by disassembling the drain and determining what is clogging it. Make sure to wear rubber gloves if you have previously tried using any drain cleaner to remove your sink clog or other disgusting residue.

 Disassembled drain assembly and hair clog

Preventing and minimizing future clogs in Sink Drains

The best method for trapping hair before it becomes clogged in your sink is to have a drain screen. There are many options available, and some work better than others. You will have to determine what works best for you and your family. These screens can either go over or be inserted into the drain.

 Using a drain screen traps hair before it gets clogged in the sink drain.

 Summary

If this project is more than you can handle, you should hire a plumber to resolve your issue. A plumber may cost anywhere from $100 to $300 to clean out your clogged drain. If you tackle this yourself, you may get by for between $20 and $100. Remember that there are videos online that you can watch to see how this is done and if you want to do it yourself.

 At HomePro Inspections, our home inspectors are trained to inspect all areas of the home. We check all sinks and shower drains to confirm they are draining correctly. Any issues found are documented in your home inspection report and recommended for resolution by a qualified professional.

 Visit our website to learn more or to schedule your home inspection in the Rochester, Owatonna, and Faribault, MN areas. You can contact us today at (507) 202-8942 or use our online “Schedule Now” feature to schedule an appointment.

Bonding Corrugated Stainless Steel Tubing (CSST)

Corrugated Stainless Steel Tubing, or CSST, is one of those things that most people don't even think about until they hear about it at their home inspection. Many homes built since the 1990s have this product, and as with most new product introductions, there is a learning curve.

 Yellow CSST gas lines are connected to a black pipe manifold.

 If your home is newer or if you have added any new appliances, the contractor probably used CSST. CSST is the flexible yellow gas line that you may see running to your furnace, water heater, or other gas-fired appliances in your home.

 Grounding versus bonding

Even after several years, there is still confusion in the real estate and home inspection industries regarding bonding. Grounding and bonding look very similar but are very different.

 Grounding ensures an electrical fault has a pathway back to the utility’s transformer. Grounding is designed to prevent harm or damage to people and property. A fault is when electricity flows on a conductor where it should not be, such as a short circuit.

 Bonding is a permanent connection to metal objects such as metal appliances, pipes, metal framing, etc. Bonding effectively connects these features to your home’s grounding system. Bonding ensures continuity if something metal becomes accidentally energized. Bonding also protects against energized potential due to a nearby lightning strike.

 What is CSST?

Corrugated stainless steel tubing, commonly known as CSST, is a flexible, semi-rigid, thin-walled tube typically covered in a yellow jacket. Newer products have a black jacketing and the ability to dissipate energy through the jacketing material. CSST should be distinct from a flexible gas connector, which is also corrugated but painted yellow.

 CSST from the wall to the black pipe. Gas appliance

connector from the black pipe to the water heater.

 CSST is designed to be bent to shape to meet installation requirements. After installation, CSST should remain stationary. Think furnaces, boilers, water heaters, cooktops, etc. CSST should not be exposed to impact, vibration, or repeated movement.

 There are only a few specifics in the building codes with respect to CSST. This can sometimes create confusion between the trades, as the plumber and electrician need to have clearly defined codes to follow. Usually, what you will find in the codes refers to the manufacturer’s instructions. Each manufacturer has produced documentation with specific installation requirements. The good thing is that these requirements are similar from manufacturer to manufacturer.

 CSST bonding

When a home inspector sees CSST at a home inspection, the first thing they look for is to see if it has been adequately bonded. Bonding means the CSST has a mechanism to ensure it has the same electrical potential as everything else. There is a risk of damage to the CSST if it is not bonded to the current standards. If there is a lightning strike, either directly to the structure or nearby, there can be arching between the CSST and adjacent metal surfaces, which may result in a gas leak.

 After initial use in the late 1990s and early 2000s, manufacturers started implementing bonding requirements in the 2006 timeframe. As home inspectors, we started calling out the lack of proper bonding as these requirements crept into the building codes.

 Does existing CSST need to be bonded?

When something was installed before existing codes, it is typically “grandfathered.” Grandfathered means that it is still compliant if installed under a previous code.

 As a home inspector, we do not focus on code compliance. Codes change about every three years. We focus on safety. Current residential construction standards may deem something unsafe, even if installed correctly according to a previous code. Per our Standard of Practice, it is the home inspector's job to document and report safety issues.

 Over time, safety issues may arise, so requirements may be updated to improve product safety and performance. Manufacturers change and improve requirements for the installation of their products. So, even if the initial installation was done correctly and according to the codes at the time, we will recommend a safety upgrade, as we know there is an unacceptable fire risk without proper bonding in the event of a nearby lightning strike.

 Bonding locations

Initially, the bonding was required to be done where the CSST originated. If it were at the gas meter, the bonding would be done at that location. If it were at a manifold in the basement, the bonding would be done at that location. Over time, it was determined that the bonding clamp attachment may be at any point in the gas piping system as long as they are placed per requirements.

 Proper bonding examples

Proper bonding requires installing a separate bonding wire with an approved bonding clamp. The bonding clamp shall be connected directly to the ridged piping or to one of the CSST nuts. Bonding is required even if there is just a short section of CSST.

Bonding clamp and wire attached to the CSST nut.

Older style yellow-jacketed CSST.

 Bonding clamp and wire attached to a rigid gas pipe.

Newer style black-jacketed CSST.

 Initially, when bonding CSST, it was required that the other end of the bonding wire be routed back to the electrical panel. The newer fuel gas codes now allow for the CSST to be bonded anywhere on the grounding electrode of the electrical service grounding system. The bonding wire can be attached to a grounding rod or any metallic water piping coming into the home, basically anywhere on the service grounding electrode system. Current requirements can be found in Section 310.2 of the Minnesota Fuel Service Gas Code. The intersystem bonding terminal is the one place you cannot bond to, as it is specifically designed for low-voltage communications systems such as phone lines, satellite systems, and internet/cable television.

 Insulation or air gap?

In addition to bonding, CSST should not contact any adjacent metal surfaces. In early installations, brackets were commonly used to attach CSST to furnace ducts or the side of a water heater. Additionally, our home inspectors find installations where the CSST is in direct contact with the sheet metal edge of a gas fireplace chassis.

 CSST in contact with the metal chassis edge at a fireplace enclosure.

 Manufacturers require an air gap or other means to insulate CSST, such as brackets that hold the CSST away from metal. If CSST is touching metal, there is a risk of arching in the event of a lightning strike. The arching may result in a hole in the CSST, which will cause a gas leak and/or fire. Installing foam tubing around the CSST or running it through a PVC tube are also ways to create separation.

 A foam tube is used to protect the CSST installed between the furnace ducts.


A PVC pipe is used to protect the CSST at the water heater.

 How can you know if you have CSST in your home?

Look for flexible tubing with a yellow or black jacket that covers the ridges. CSST either has a yellow jacket or a black jacket. This material is not to be confused with an appliance connector, which might have a yellow coating that follows the contours of the ridges. The photo below shows the two different materials.

        Photo by Rueben Saltzman

 Summary

If your home has CSST, you should ensure it is bonded and has proper clearances from metal surfaces by today’s standards. Codes change for performance and safety over time. Even if your CSST met the code at the time of the installation, we have learned that there are some reasonable safety measures added that will help to protect you and your family.

 When in doubt concerning your CSST installation, call a qualified professional. They will make sure that the CSST is installed following the manufacturer's instructions as well as the latest building code.

 At HomePro Inspections, our home inspectors are trained to inspect all areas of the home. Proper installation of CSST to meet the latest requirements is an important safety issue. Any issues found are documented in your home inspection report and recommended for resolution by a qualified professional.

 Visit our website to learn more or to schedule your home inspection in the Rochester, Owatonna, and Faribault, MN areas. You can contact us today at (507) 202-8942 or utilize our online “Schedule Now” feature to set up an appointment.

Maintenance Checklist for Fall

I spent some time this past weekend preparing our home for winter. It was a beautiful fall day, so I managed to complete all of my fall maintenance tasks. Taking care of your home, especially the outside stuff, before the weather gets cold and miserable is well worth the time and effort.

 Below are some maintenance items you may want to consider to better care for and protect your home for the upcoming winter season.

 Remember, as with everything, know your limits and skill level. If you are not comfortable with any of these tasks or if accessing your roof is unsafe, please hire a professional.

 Outdoor Maintenance

·         If you have an irrigation or sprinkler system, you want to have it serviced and drained before the temperatures drop into the freezing range. 

·         Remove your garden hoses. If your faucets cannot drain, they can end up bursting a pipe due to freezing. Even frost-free faucets can freeze if the water is not allowed to drain due to frozen water in a garden hose.

·         Remove pumps and drain any outside water features, such as garden ponds.

·         Drain utility sinks and winterize them if you have an unheated garage.

·         Seal any gaps or cracks on the exterior of your home. Look for areas around your windows and doors and any vents, pipes, or trim.

·         Inspect your window screens. Remove them and have them repaired and ready for spring.

·         Inspect and replace any damaged or worn weather stripping around doors and windows.

·         Clean your air conditioner coils and replace damaged insulation on your refrigerant line. Air conditioners do not need to be covered. Covers trap moisture, which can result in rust and corrosion.

 Roof

·         Inspect your roof from the ground with binoculars, looking for any damage. Look for any damage to the shingles. Make sure that any tree branches that may be touching the roof are trimmed back. 

·         Clean your gutters and downspouts after the leaves have finished falling from the trees. Even if you have gutter guards, small debris can fill up in the valleys or at the downspouts. Plugged or restricted gutters can lead to ice dams in the winter. Ensure your downspouts and discharge chutes are unobstructed and directed away from the foundation.

 Heating, Exhaust, and Ventilation

·         Clean any fresh air vents or combustion make-up air for your heating system.

·         Clean your dryer vents. If you have any flexible plastic vents, consider replacing the material with solid metal smooth bore dryer venting.

·         Inspect and clean the vents, filters, and core in your air exchanger system if one is installed.

·         Clean out any debris or hornet or wasp nests from your kitchen or bathroom exhaust vents, and make sure the dampers work freely. Do this for all external vents.

·         Have your furnace or boiler professionally maintained. A clean system will operate more efficiently and reliably.

·         If your thermostat has batteries, replace them. If your batteries fail in the middle of the night or while you are away on a winter vacation, your furnace will not function.

·         Replace your furnace filter. Whether you use a 12-month, 3-month, or 1-month filter, it is essential to change them on schedule. A plugged filter will keep your furnace from operating correctly.

·         If you have a wood or gas fireplace, have it professionally cleaned and maintained. Don’t forget about the chimney or through-wall exhaust venting.

 Interior Maintenance

·         Change the batteries in your smoke and carbon monoxide alarms.

·         Clean your refrigerator and freezer cooling coils.

 Summary

Your home is probably your most important asset. Maintained and adequately functioning home systems will help manage costs and keep your home looking good. Although the above list is only partially comprehensive, it will give you a great start and some guidance.

 At HomePro Inspections, our home inspectors are trained to inspect all areas of the home. Deferred maintenance can turn a relatively simple project into a more serious repair if left unchecked. Any issues found are documented in your home inspection report and recommended for resolution by a qualified professional.

 Visit our website to learn more or to schedule your home inspection in the Rochester, Owatonna, and Faribault, MN areas. You can contact us today at (507) 202-8942 or utilize our online “Schedule Now” feature to set up an appointment.


Why Are Double-Tapped Breakers a Problem?

You just had a home inspection, and your home inspector called out a defect in your electrical breaker panel. The defect is a double-tapped breaker. What does it mean to have a double-tapped breaker? A double-tapped breaker is when more than one wire is inserted into a circuit breaker designed specifically for a single wire. The professionals at HomePro Inspections are trained to look for, identify, and document this type of potentially dangerous problem.

 Single wires connected to circuit breakers

 Why is this a problem?

Although some breakers are designed to hold more than one wire, most are not. You must understand the difference and determine if there is a problem. If you encounter a double-tapped breaker in your electrical panel, you may need to contact an electrician to resolve the issue. It can be a fire hazard if two wires are installed in a breaker designed for one wire.

The top diagram shows two wires at the circuit breaker.

 If two wires are connected to a breaker that is not designed for two wires, it can and may result in overheating or arcing because they cannot be attached tightly enough. If the two wires are of different gauges, the screw used to secure the wires will tighten on the larger wire but not the smaller one.

 Ways to fix double taps

There are a variety of ways that this problem can be resolved. Below, we will explore a few possibilities. Refer to the panel guidelines for your specific electrical panel rules and specifications regarding breaker styles.

 ·         Pigtail: This is done by removing the wires from the breaker connection and adding a third wire. Wire-nutting the two wires with a short section of wire will allow you to secure the added wire to the circuit breaker.

An example of a pigtail

 ·         Tandem circuit breakers: These are special breakers designed to create two breakers that will fit into the space of one breaker in the electrical panel. You can re-attach the two wires to each of the connections.

·         Two-wire-designed breakers: Some companies have circuit breakers designed to accommodate a two-wire connection.

·         Add another breaker: If there is room in the electrical panel, you can add another breaker and move the wire.

 How much does a circuit breaker cost?

A circuit breaker from a hardware store, big-box store, or the internet can cost anywhere from around $6.00 to $60.00 and more. Why the huge difference? Circuit breakers range from very simple to complex, and manufacturer and configuration come into play. If you don’t know what type of circuit breaker you need or don’t have the skills to do the work, for safety’s sake, we recommend that you hire an electrician.

 How much does it cost to have an electrician add or replace a circuit breaker?

Having an electrician add a circuit breaker to your breaker box can vary in price. Not only does it depend on the type and cost of the breaker, but also how long it takes the electrician to do the work. Generally, it takes most electricians two hours to install a new circuit breaker in your breaker box. Anytime you need to add a breaker to fix a double-tapped breaker, expect to pay $150 to $250.

 Summary

In most cases, a homeowner will not open up an electrical panel and inspect it for defects. A home inspector usually catches these types of defects during a home inspection or if you are having electrical work done on your panel.

 At HomePro Inspections, our home inspectors are trained to inspect all areas of the home. Any electrical issues are documented in your home inspection report and recommended for resolution by a qualified professional.

 Visit our website to learn more or to schedule your home inspection in the Rochester, Owatonna, and Faribault, MN areas. You can contact us today at (507) 202-8942 or use our online “Schedule Now” feature to schedule an appointment.


Have You Ever Been in Your Home’s Crawl Space?

Most homes in our area have basements. However, your home may have a full or partial crawl space. Crawl spaces were popular from the 1950s into the 1960s in areas that have a high water table or are prone to occasional flooding. We also find them during home inspections of homes that have built an addition.

 A crawl space with a dirt floor, debris, and old insulation

 What is a crawl space?

The crawl space is that area underneath your home between the bottom of the floor joists and the ground. Your crawlspace usually has ventilation, plumbing, gas hookups, HVAC ductwork, electrical wiring, and components. If you live in a rural area, there may be a pressure tank for your well. The crawl space allows access to these features of your home.

 Why is a clean crawl space important?

The crawl space under your home is designed to elevate your home to avoid potential flooding. Typically, a crawl space will be anywhere from 18 inches to 2–3 feet deep in an older home. Keep in mind that entering your crawl space may be uncomfortable and cramped. Excess debris and moisture can be potentially dangerous. If you are uncomfortable entering your crawl space, you may want to hire a professional.

 Keeping your crawl space clean and dry is important. Below are some things to consider if your home has a crawl space. If you have had a home inspection, your home inspector may have commented on one or more of the following:

 Excess debris: If there has been work performed in your crawl space, sometimes the person doing the work leaves scrap wood, plumbing, wiring, and insulation that is not used lying in the crawl space.

 Pests: Look for indications of rodents, snakes, or other small animals in your crawl space. If you see “eye shine,” you should leave the crawl space and call an exterminator. There is something bigger in your crawl space that needs to be trapped or otherwise removed.

 Mold: If the crawl space is continually wet, there may be mold issues. Your crawl space must be dry and ventilated.

 Water leaks: Many homes built back in the day had galvanized and cast-iron drain and sewer lines. Over time, these materials may pit and deteriorate, resulting in leaks that go undetected.

 Standing water: Any standing water should be resolved and its source determined. There may be a need to add a sump basket and pump as well as landscaping to deter water from entering your crawlspace.

 Damaged vapor barrier: Some crawl spaces have a vapor barrier. This barrier helps keep moisture in the ground from entering the crawl space. If the vapor barrier is torn, damaged, or deteriorated, it should be removed or replaced.

 Environmental hazards

If there is ductwork in your crawl space, the air quality of your home may be affected. You can do mold testing to determine if mold is present. If it is, you need to get it resolved as soon as possible. If there are pests or rodents living in the crawl space, they need to be removed and their point of entry repaired. You may also want to have your home tested for radon.

 Measuring the moisture content of moldy, deteriorated wood

 Inspecting and cleaning your crawl space

If you are a DIY kind of person, you may want to take on cleaning your crawl space by yourself. If so, you will want to make sure that you have the proper personal protective equipment, such as a Tyvek crawl suit, disposable rubber gloves, a headlight, and a respirator mask.

 Start at the far end and work your way towards the crawl space access. Make sure to have something to collect the debris in, such as a plastic sled or a big sheet of plastic. Don't go too big, as you will need to get anything collected through your attic access.

 Also, make sure to look for signs of any of the issues listed earlier in this article. Pests, mold, water leaks, and standing water should be dealt with promptly. If you are uncomfortable with resolving any of these issues, you may want to hire a professional.

 Summary

A clean crawl space, although very seldom seen, is important to your family's health and safety. Use caution and make sure that you are safe if you are going to enter a crawl space. Our home inspectors at HomePro Inspections will not enter crawl spaces that may pose a safety issue.

 At HomePro Inspections, our home inspectors are trained to inspect all areas of the home. Any issues found are documented in your home inspection report and recommended for resolution by a qualified professional.

 Visit our website to learn more or to schedule your home inspection in the Rochester, Owatonna, and Faribault, MN areas. You can contact us today at (507) 202-8942 or use our online “Schedule Now” feature to schedule an appointment.


Why Does My Bathroom Sink Gurgle?


 Using a plunger to unclog a gurgling sink.

 Maybe you are a new homeowner, or perhaps you have owned your home for a while. Either way, you’ve probably realized that home ownership comes with chores. The last thing on most people’s minds is maintenance. We get into the habit of reacting to problems rather than being proactive to prevent them.

 One example can be your bathroom sink, bathtub drain, or toilet. One or more of these can have the drain plugged, which results in gurgling when draining. Before you figure out where to start with fixing the gurgling, you may have to do some inspection and troubleshooting.

 What are some causes of sink gurgling?

There are several reasons your sink may be gurgling, but the fundamental idea here is to have “air behind water” when the water is trying to flow in the drain. If the drain is not allowed to freely pull air into the plumbing system through the vent pipe, it will try to draw it from somewhere else. Below are a few things you can inspect to try and resolve your issue.

 ·        Clogged P-trap: All sinks have a P-trap directly under them. The P-trap keeps sewer gases from escaping from the plumbing system. Click here to learn more about sink traps.

·        Clogged vent pipe: The vent pipe usually exits your home through the roof. Sometimes they can be clogged due to leaves and debris from trees or birds. Our home inspectors have even come across a vent pipe that still has the plumber’s cap installed from when the home was built.

·        Clogged bathtub drain: A clogged bathtub drain can result in pressure buildup when draining. This can result in gurgling at your sink or toilet.

·        Clogged garbage disposal: Similar to your bathtub, if the drain at the garbage disposal gets clogged, air is trapped and may result in gurgling.

·        Clogged drains: Anywhere there is a clog in the plumbing system, there is potential for gurgling.

 Can I fix the gurgling in my sink?

The answer is yes; there are several things you can do to help prevent and stop the gurgling in your sinks. Cleaning out any clogs in your plumbing system is the first step in the process. Work through the list below until you have resolved the gurgling problems.

 ·        Start with a plunger. Using a small plunger may be the first tool on your list for unclogging a drain. Seat the plunger evenly in the sink.  Push straight up and down several times to try and suck out or dislodge the clog.

·        Try a drain cleaner. Drain cleaners can be harsh on both you and the environment. Try to choose something that is environmentally friendly but will still do the job. One of the simplest and somewhat effective solutions is vinegar, baking soda, and hot water.

·        Use a drain snake. A drain snake can reach farther into the plumbing to dislodge a clog. If it’s a bigger pipe that’s clogged, you may want to rent something to meet your needs.

·        Flush the system. If the solutions above don’t quite solve your problem, try flushing the system for 15 minutes with hot water. Sometimes filling the sink or tub in question with hot water and pulling the plug will help to remove the clog. The pressure and flow of draining a sink will give it a little extra boost.

·        Clean the P-trap. Sometimes the P-trap is so clogged that the only way to resolve the issue is to remove it, clean it out, and replace it.

 Cleaning a hair clog from the drain system under a sink

 If all else fails, there may be a blockage at the main vent or at an air blockage valve. If you flush a toilet and a sink gurgles, that means you have a blocked main vent. The gurgling in the sink is a result of the system sucking air past the P-trap to allow for drainage. Access to the main vent stack is usually on the roof. Use your best judgment on whether you attempt to snake it out or hire a professional plumber.

 Vent stack on a roof

 Summary

A gurgling sink or tub drain can be annoying, but the good news is that most times it can be easily resolved. The suggestions above are fairly simple for the average DIY person to complete with little time or effort. If you are not comfortable performing some of these tasks or getting on your roof, I recommend hiring a professional.

 At HomePro Inspections, our home inspectors are trained to inspect all areas of the home. Any issues found with gurgling sinks or tubs are documented in your home inspection report and recommended for resolution by a qualified professional.

 Visit our website to learn more or to schedule your home inspection in the Rochester, Owatonna, and Faribault, MN areas. You can contact us today at (507) 202-8942 or use our online “Schedule Now” feature to schedule an appointment.

Water Heater Maintenance Tips

We depend on our water heaters to provide us with an unlimited supply of hot water. Hot water is a necessity for showering, washing our hands, clothes, and dishes, and sometimes taking a long, relaxing hot bath. Like the other many appliances in our home, we just expect that it will work forever.

 Proper water heater maintenance is important to help optimize its lifespan. When maintained properly, your water heater can last up to 15 years or even longer. Water heater maintenance can easily be a DIY type of activity, but if you’re unsure of what’s needed, hire a professional to get it done correctly. Below are some maintenance tips that we feel will help you get the most life out of your water heater.

 Making adjustments during water heater maintenance

 Flush the water heater

Over time, sediment can build up at the bottom of the water heater tank. Maintenance that includes regular flushing of the tank will help to clean out sediment.

·         Turn off the water supply and all sources of energy, electrical or gas.

·         Attach a garden hose to the drain valve at the bottom of the water heater. I use a short 6-foot section.

·         Open the valve and let the water run to a drain or into a large bucket.

·         Once the sediment is flushed, the water should run clear.

·         Return your system to normal operating conditions.

 Attaching a garden hose to the water heater drain valve

Adjusting the water temperature

Is your water heater gas or electric? When we inspect your home, our home inspector will document the type of water heater you have on your home inspection report. For you DIY types, look to see if a gas line or an electrical line is going to your water heater. If in doubt, the data plate sticker on the water heater should indicate what type of water heater you have. Items to look for that can help identify what type of water heater you have:

·         An electric water heater will likely have an adjusting screw behind a panel near the bottom of the unit.

o    Turn the power to your water heater off before removing the panel covers and making any kind of adjustments.

·         A gas water heater will have a thermostat control near the bottom of the unit. Simply turn the knob to your desired heat setting.

 General locations for electric and gas water heater temperature adjustments

 Inspect your water heater for leaks

Your home inspector will check your water heater for any signs of leaking. You can simply do the same when performing your water heater maintenance.

·         Inspect the water lines and valves coming to and from the water heater.

·         Look for water or stains and corrosion at the water heater's top, sides, and bottom.

·         Check to see that the drain valve is securely closed and not leaking.

·         Open and close the Temperature and Pressure Relief Valve (TPRV), making sure that it is not leaking.

·         If you find any leaks that you can’t easily resolve, call a professional.

 Money-saving tips

·         Set the water heater temperature as low as possible, yet comfortably maintains your hot water needs. Lower temperatures help keep children safe from scalds or burns.

·         Use “vacation mode” or the lowest setting if you are going on vacation or if your home is seasonal, such as in the case of snowbirds or the cabin up north.

 Summary

Hot water in your home is essential to your comfort and health. Water heaters don’t last forever, and they can be quite costly to replace. Taking the time to ensure your water heater is running properly can help extend its life and save you money. If you are not comfortable performing these maintenance items, hire a professional.

 At HomePro Inspections, our home inspectors are trained to inspect all areas of your home. Any issues found with your water heater are documented in your home inspection report and recommended for resolution by a qualified professional.

 Visit our website to learn more or to schedule your home inspection in the Rochester, Owatonna, and Faribault, MN areas. You can contact us today at (507) 202-8942 or use our online “Schedule Now” feature to schedule an appointment.


Home Inspections and Inspecting Air Conditioners

Inspecting air conditioners during a home inspection and what a home inspector does can sometimes be misunderstood. Using the Standards of Practice (SOP) set forth by InterNACHI, we will try to explain the process and hopefully clarify the difference between testing at a home inspection and what a service person does when servicing an air conditioning system.

 Air Conditioning Unit Sitting on a Pad

Section 3.5: Cooling from the SOP

 I. The inspector shall inspect:

  1. the cooling system, using normal operating controls.

II. The inspector shall describe:

  1. the location of the thermostat for the cooling system; and

  2. the cooling method.

III. The inspector shall report as in need of correction:

  1. any cooling system that did not operate; and

  2. if the cooling system was deemed inaccessible.

IV. The inspector is not required to:

  1. determine the uniformity, temperature, flow, balance, distribution, size, capacity, BTU, or supply adequacy of the cooling system.

  2. inspect portable window units, through-wall units, or electronic air filters.

  3. operate equipment or systems if the exterior temperature is below 65° Fahrenheit or when other circumstances are not conducive to safe operation or may damage the equipment.

  4. inspect or determine thermostat calibration, cooling anticipation, or automatic setbacks or clocks.

  5. examine electrical current, coolant fluids or gases, or coolant leakage.

 Normal operating conditions

To start with, we need to make sure that the air conditioning unit is warm enough. The external temperature needs to be at least 65 degrees for a minimum of 24 hours. This is important because there is potential to damage the condensing unit if it is operated at temperatures that are below 65 degrees.

 Unfortunately, here in Minnesota, there are some years when we cannot physically run air conditioners from late fall into late spring. This is as frustrating for us as it is for the people we are doing the home inspections for. If the temperatures do not meet operating criteria, we document in the inspection report that we were unable to fully inspect.

 If the air conditioner is not already set and running, your home inspector will switch the thermostat to cool mode to engage the system. The home inspector will document whether there is a single thermostat or multizone and whether or not the thermostat is programmable or not.

 The type of system present

The type of air conditioning system is documented in your inspection report. Typically, in our region, air conditioners are either a central air conditioning system, a window or wall unit, or a small split system.

 The location of the air conditioning unit on the exterior of the home is documented. There are several things that we look at on the exterior. When the unit is running, we make note of whether there are any unusual noises, vibrations, etc.

 Ensure the air conditioning unit is sitting level

The bearings in the compressor and fan of the condensing unit are designed to run in a vertical position. If your air conditioner is sitting on a pad that has settled, there will be a radial load on the bearings that may cause premature wear. Any unevenness will be documented as in need of correction.

 Proper operational clearances

The compressor unit should have a minimum of 12 inches of clearance on all sides and be unobstructed above the unit. This allows for the fan to adequately pull air through the cooling coils from the sides and blow it up and out of the top.

 The home inspection report will document any vegetation that needs to be cut back, debris such as grass clippings or dryer lint, and any damaged cooling fins in need of repair.

 Refrigerant lines

There are two lines running from the external condensing unit back to the air handler and cooling coil. One of them has no insulation and is called the high-pressure line, and if the unit is running, this line will be very hot. The refrigerant line, or suction line, is very cold and runs to the cooling coil. It should be completely covered with insulation. Any missing or damaged insulation will be documented as in need of repair.

 Air Conditioning Condensing Unit

Electrical Disconnect and Refrigerant Lines are Labeled

Electrical

An electrical disconnect is required within sight of the condensing unit. This disconnect allows a service person to safely remove power from the condensing unit while servicing. The type of disconnect will be documented in your home inspection report. Any damage or lack of a disconnect will be documented as in need of repair.

 Tumble Switch” Electrical Disconnect

Your home inspector will also look at the data plate on the side of the unit to determine the minimum and maximum amperage. For example, if the data plate indicates a maximum 30-amp breaker, we will confirm the breaker in the electrical panel. For example, we occasionally see in older homes where the data plate on a newer air conditioner indicates a maximum 20-amp breaker. However, when we inspect the electrical panel, we find a 30- or 40-amp breaker, which may have been the requirement for a much older unit. This defect would be documented as in need of repair.

 Data Plate Showing a Maximum of a 30-amp Fuse or Breaker

 Supply and return registers

Once we're in the house and the air conditioning unit has been running for a while, we check the supply and return vents to confirm that the air conditioning is running properly. There should be a difference in temperature of 14 to 21 degrees between the air blowing into a room and the air being sucked out of the room. Anything outside of that range indicates that the air conditioner is not functioning properly. The caveat here is that if it's 70 degrees outside and 72 degrees inside, we may not get that 14- to 21-degree difference between the two temperatures. Your home inspector needs to take this into consideration when taking these measurements.

 Furnace/air handler

When at the furnace, we look to see that there is a condensate drain line and that it is properly routed to a drain or a miniature sump pump. The condensate line takes the moisture that is removed from the air at the cooling coil and drains it from a catch tray. Any corrosion on the air handler chassis or water on the floor around the furnace would indicate the condensate line is plugged and the water is overflowing. Some furnaces, such as the one below, have a condensate overflow alarm installed.

 Furnace/Air Conditioner Air Handler

 Summary

As you can see, there is quite a bit that goes into inspecting an air conditioner during the process of a home inspection. This is primarily a visual inspection and is not 100% technically exhaustive. Our best recommendation to keep your air conditioner running at peak performance is to have annual checkups performed by a reputable HVAC company. They have tools and techniques that go above and beyond our standard practice.

  At HomePro Inspections, our home inspectors are trained to inspect all areas of the home. Any issues found are documented in your home inspection report and recommended for resolution by a qualified professional.

 Visit our website to learn more or to schedule your home inspection in the Rochester, Owatonna, and Faribault, MN areas. You can contact us today at (507) 202-8942 or utilize our online “Schedule Now” feature to set up an appointment.

Does My Water Heater Need a TPR Valve?

Water heaters are a pretty resilient piece of equipment that provides you with hot water for your home. Unfortunately, since they operate pretty much seamlessly, most people completely forget about them. Keeping the safety features of your water heater properly maintained will help to prevent leaks and ensure proper operation in the event your water heater overheats.

 Temperature and Pressure Relief Valve (TPRV or TPR Valve)

 What is a TPRV?

Your Temperature and Pressure Relief Valve (TPR valve, or TPRV) is a safety feature that ensures the proper operation of your water heater. When heat is added to water, the water vaporizes and expands. The expansion of the water within your water heater creates increased pressure within. In the event that the water gets too hot and the pressure becomes too high, the TPR valve will open and allow that pressure to be relieved.

 A water heater can explode and launch if the internal pressure gets too high. This is a very rare occurrence to have a tank explode, but it can happen with defective TPRVs. To demonstrate the potential of an exploding water heater, take some time to watch this video from MythBusters.


If you are at your home inspection, your home inspector will usually explain what a TPRV is and why it is there.

 Water heater with TPRV and discharge pipe (right side)

 How to test a TPRV

A little maintenance will go a long way toward improving performance and keeping your water heater running safely. Take a little time every six months to perform a few key maintenance tasks, such as checking the water heater TPRV.

 ·        Lift the lever on your TPR valve up and down several times. This should open the valve and allow water to flow out of the drainpipe.

·        A reasonable amount of water should flow out of your water heater. If there is no water or barely a trickle, you should have your water heater serviced.

·        If water continues to flow out of your discharge tube after you have closed the TPR valve, there may be a piece of debris stuck in the valve. Open and close the valve several times to flush anything that may be blocking it from closing.

 Discharge pipe

Your water heater should have a discharge pipe attached to your TPRV. This is designed to direct any steam or water that is discharged down to the floor level.

 Confirm that your drain pipe is secure in the TPRV and that it extends down to within 6 to 18 inches of the floor. If your water heater is missing a discharge pipe, make sure to get one installed. If your water heater overheats and discharges through the TPRV without a discharge pipe, water and steam will be blown across the room rather than down to the floor. A missing discharge pipe could result in scalding or burns if somebody happens to be adjacent to the water heater.

 Summary

The TPR valve on your water heater is an important safety feature that should be maintained properly. Paying attention to small maintenance items will keep your equipment running properly throughout the years.

 At HomePro Inspections, our home inspectors are trained to inspect all areas of the home. TPRVs and discharge pipes are inspected as part of the water heater inspection. Any issues, such as leaking or corrosion, are documented in your home inspection report and recommended for resolution by a qualified professional.

 Visit our website to learn more or to schedule your home inspection in the Rochester, Owatonna, and Faribault, MN areas. You can contact us today at (507) 202-8942 or utilize our online “Schedule Now” feature to set up an appointment.

Why It’s Important to Clean Your Home’s Siding

Just like everything else, your vinyl siding needs to be cleaned. Over time, you may notice black, gray, and green stains on your siding, especially on the north side and areas where the sun doesn’t shine. Regardless of the type of siding, it gets dirty, and it needs to be cleaned at least once a year to stay looking good.

 Dirty vinyl siding

Pollen, dirt, and other debris blown around in the wind will accumulate on your home’s siding, along with bird poop and whatever it is that bugs and other critters leave on your home. All of this, along with moisture, can result in algae and mold growing on the surface of your siding. It's worse in areas of the country where it's damp and humid most of the time. It's a slow process of buildup, making your home’s siding look dingy and dull. That’s why it’s a good practice to clean the siding on your home at least once a year.

 Spring is a good time to clean your siding, but in reality, any time of year is fine. Choose a day that's going to be warm and sunny with very little wind. Before you start, take some time to inspect your siding, looking for areas that have heavy buildup, peeling paint, or other damage. If you are new to your home, check your home inspection report to see if your home inspector noted any maintenance or repair issues that need to be addressed.

 Methods to Clean Your Siding

 Basically, there are three simple methods you can use to clean your siding: a soft brush or cloth, a garden hose, or a pressure washer. Make your choice based on your siding, how dirty it is, and how large an area needs to be cleaned.

 Cleaning siding with a power sprayer and soap dispenser

Some experts caution against using a pressure washer to clean your siding. If you're not careful, you can cause damage to the surface. Make sure to keep the pressure lower and stay consistent with your spraying methods. You want to make sure that you're holding the power washer perpendicular to the wall. Don't aim your spray upwards, as you may drive water behind the siding. Use caution in areas where there might be damage or gaps in the siding that could blow out from higher pressures.

 If your siding is mildly dirty, you may just use a garden hose with a sprayer attachment to rinse off any debris that may have accumulated. This may work for most areas of your home.

 For minor stains and buildup, you can use a bucket of warm, soapy water and a soft bristle brush to loosen and remove the filth. Ordinary dish soap works well to loosen and remove light dirt, bird poop, and bug droppings.

 Cleaning Solutions for Siding

 As with anything else, there are an abundance of cleaning products out there to assist you in cleaning your home’s siding. Do your research and choose a product that meets your needs.

 Some products come in a container that can be screwed directly onto the end of your garden hose and sprayed onto your siding. Other products can be added to the soap dispenser of your power washer or just added to a bucket of warm water. I'm not making endorsements, but two products that I have personal experience with are “Wet and Forget” as well as “Moss Max.” They both work well. Make sure to completely follow all safety precautions with these products. If you want to stick with something more natural, use a solution of 30% white vinegar in your bucket of water. Vinegar works, but you may have to work a little harder in areas where the stains have built up.

 Process

 Typically, if you are adding a cleaning solution, you would want to start the application at the bottom and work your way up. This will prevent streaking. Work in smaller sections that are manageable and won't dry out before you have a chance to rinse. Rinse from the top down. Also, make sure that you protect any plants or decorations that may be near the side of the house. Some of these chemicals are harsh and will damage your vegetation and flowers.

 Safety

 Safety is important with all DIY projects. Make sure that you are wearing the proper personal protective equipment (PPE) recommended by any of the products you may use to clean your siding. Also, if you are using a ladder, make sure that you set it up properly so that it is stable and safe to be on. Don't forget that there may be electrical outlets and lighting that are going to get wet while you are cleaning your siding.

 Summary

 Whether you clean your home’s siding yourself or hire a professional, it's important to keep your house looking clean and protect the exterior. Staying on top of it by cleaning your siding annually will make the job easier in the long run.

 At HomePro Inspections, our home inspectors are trained to inspect all areas of the home. Deferred maintenance and the buildup of mold, mildew, and debris can turn a relatively simple project into a more serious repair if left unchecked. Any issues found are documented in your home inspection report and recommended for resolution by a qualified professional.

 Visit our website to learn more or to schedule your home inspection in the Rochester, Owatonna, and Faribault, MN areas. You can contact us today at (507) 202-8942 or utilize our online “Schedule Now” feature to set up an appointment.


Kitchen Exhaust Fans

Keeping your home safe and having clean, quality indoor air is essential for your family’s health. What you cook, how you cook it, and the fumes, smoke, grease, odors, and steam that cooking creates all play a major role in indoor air quality. A kitchen exhaust fan helps to remove these components of cooking to keep your indoor air safe and clean.

 Ducted kitchen exhaust fan

As home inspectors, we come across many variations of kitchen exhaust fans, with just as many questions regarding kitchen exhaust. Some vents exhaust to the exterior, some recirculate, and sometimes kitchen exhaust vents are just nonexistent.

 Are kitchen exhaust fans required?

There are no requirements in the International Mechanical Code requiring exhaust fans in residential kitchens. There are, however, requirements for the installation of exhaust fans. Section 505 explains these requirements.

 Although not required, kitchen exhaust fans are a good idea and should exhaust to the outside (exterior) of your home. Even the best cooks can burn something on the stove or create a meal that has some pretty strong odors!

 My wife and I learned from a recent new-home build that proper sizing is important when choosing a kitchen exhaust fan. My wife showed me a model that could run at 900 cfm. We thought that bigger was better, as the kitchen, dining room, and great room were all one big space. When we got the quote back from the HVAC contractor, there was a line item for a $3,600 make-up air system on the bid. We asked about this, and the contractor shared that the code requires make-up air for anything over 400 cfm. Because the exhaust fan we chose was so powerful, the make-up air system had to also be able to heat or condition the make-up air. We returned the unit and found a fan that was below the make-up air requirement.

 Ductless or ducted?

Exhaust fans come in two types of systems; they can either be ducted or ductless (recirculating). Most over-the-stove microwaves are equipped with an exhaust fan, and they generally have the option to be installed as either ducted or ductless.

 A ducted system vents the exhaust to the exterior of your home. A ducted system should not exhaust kitchen air into the attic space because any moisture in that air can potentially create serious issues. Ductless (recirculating) systems draw the air from immediately above the stove and vent it directly back into the kitchen environment.

 Our home inspectors look for vent terminations on the exterior roof or wall when inspecting the exterior of the home. A ductless system has a fan that circulates the air through a filter and returns it to the room. The downside of a ductless system is that if you burn something or have strong odors, they are not removed from the living space.

 Summary

Even though exhaust fans are not required, our home inspectors will note on the home inspection report whether or not the exhaust fan in the kitchen is venting to the exterior or not. We will also note if there is no exhaust fan on the home inspection report and explain to our clients the importance of a proper exhaust fan to keep the air inside your home clean and safe.

 At HomePro Inspections, our home inspectors are trained to look for and report any potential ventilation issues. Any issues are documented in your home inspection report and recommended for resolution by a qualified professional.

 Visit our website to learn more or to schedule your home inspection in the Rochester, Owatonna, and Faribault, MN areas. You can contact us today at (507) 202-8942 or utilize our online “Schedule Now” feature to set up an appointment.

Extension Cord Safety

My home inspector called out the use of extension cords as permanent wiring on my home inspection report. This seems like a bit of a stretch as far as defects go, but we see overuse and improper use of extension cords at home inspections more than you would think.

 Variety of extension cord sizes and lengths

We see extension cords used a lot in utility rooms and garages where there may be just one or two outlets. That may have been adequate when the home was built, but now your utility room has a power vent water heater, a water softener, a wireless router, a modem, and the washing machine. Hey, they have these fancy adapters, so why not use them? Just use an extension cord and plug everything in.

 Our home inspectors see power strips plugged into extension cords with multiple devices plugged into them. In older garages, a homeowner may run an extension cord up to the ceiling with a power strip attached, with both garage door openers plugged into the power strip.

Multiple cords plugged into duplex with a 6-plex adapter

Every year in this country, there are around 3300 fires in homes due to the use of extension cords. Of these 3300 fires, around 50 people were killed, with another 270 injured. Improper use of extension cords can cause them to overheat, resulting in a fire.

 Extension cord safety guidelines

·         Avoid plugging extension cords together. Use an appropriate length to get to where you have to go.

·         Extension cords are for temporary use only.  Do not use them in place of permanent wiring.

·         Confirm the proper extension cord ratings. Don’t use indoor-rated extension cords outdoors.

·         Make sure that the extension cord is rated for the required power needs.

·         Outdoor extension cords should be free of snow and standing water.

·         Have additional outlets installed in areas where you rely on extension cords to meet your power needs.

·         Always inspect extension cords for damage before using them.

·         Do not use extension cords that are missing their ground prong. Sometimes people cut the ground plug so they can use a 2-prong outlet.

·         Do not staple, nail, or otherwise secure power cords to walls, ceilings, rafters, baseboards, etc.

·         Do not run extension cords under rugs or carpet, through walls or floors, or into attic spaces through the ceiling.

·         Extension cords without independent safety ratings should be discarded.

·         Do not use extension cords for auxiliary heaters. They draw a lot of power and may cause the cord to overheat.

·         Make sure you are not using interior extension cords for outdoor use.

·          Follow safety protocol when using extension cords outdoors

Amperage limits for extension cords

Always choose an extension cord that meets your needs. There is no use dragging out a 100-foot extension cord if you only need 25 feet. Ensure that the cord you use will handle the amperage needs for the task at hand. Using a 100-foot 16-gauge cord for an air compressor that draws 20 amps may result in overheating and damage to the extension cord, not to mention the potential for fire. Below are some guidelines for choosing an extension cord:

 ·         25- to 50-foot extension cords

16 Gauge (1-15 Amps)          

14 Gauge (14–15 Amps)

12 Gauge (16–20 Amps)

 ·         50- to 100-foot extension cords

16 Gauge (1–10 Amps)

14 Gauge (11–13 Amps)

12 Gauge (14–15 Amps)

10 Gauge (16–20 Amps)

 ·         100- to 150-foot extension cords

14 Gauge (1–7 Amps)

12 Gauge (8–10 Amps)

10 Gauge (11–15 Amps)

 Summary

Extension cords are handy and safe when used properly. Unfortunately, they can sometimes become a permanent solution due to the lack of adequate outlets in garages, utility rooms, or outdoors.

 When performing a home inspection, our home inspectors are on the lookout for extension cords used as permanent wiring. At HomePro Inspections, our home inspectors are trained to inspect all areas of the home. Any issues found are documented in your home inspection report and recommended for resolution by a qualified professional.

 Visit our website to learn more or to schedule your home inspection in the Rochester, Owatonna, and Faribault, MN areas. You can contact us today at (507) 202-8942 or utilize our online “Schedule Now” feature to set up an appointment.